1.Account Activation and Login
1.1.Activate Account
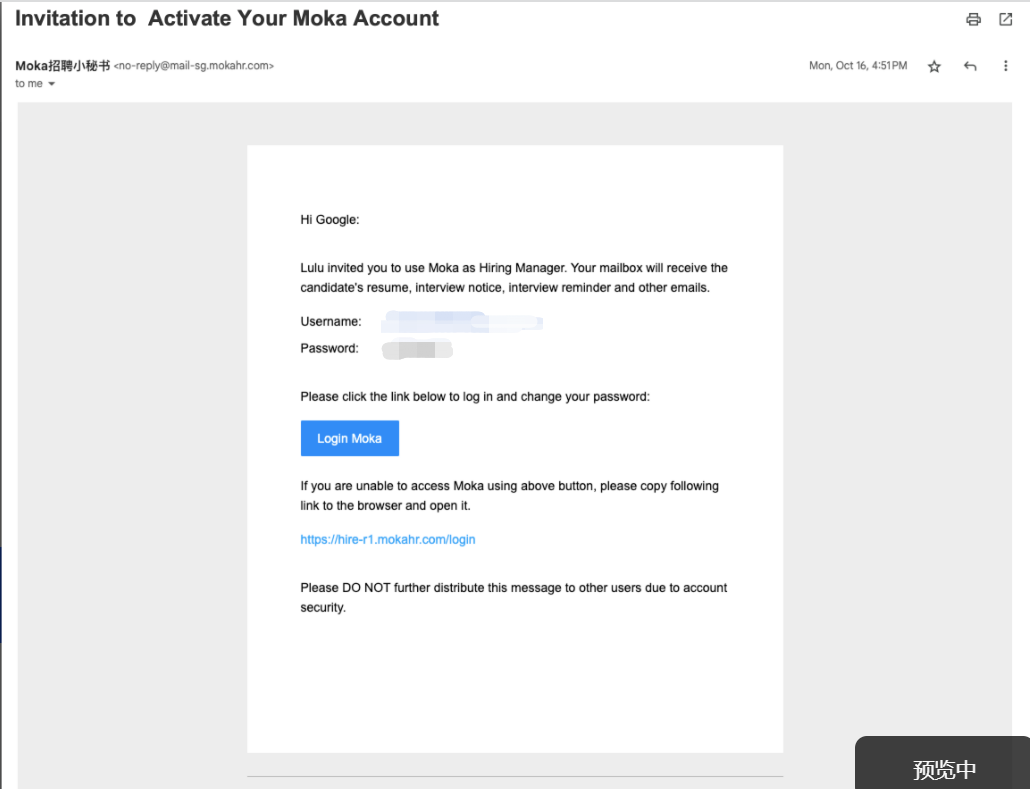
After the administrator creates your account, you will receive an invitation email.
Please check your inbox for the invitation email from Moka.

1.2Log in
URL:https://hire-r1.mokahr.com/login

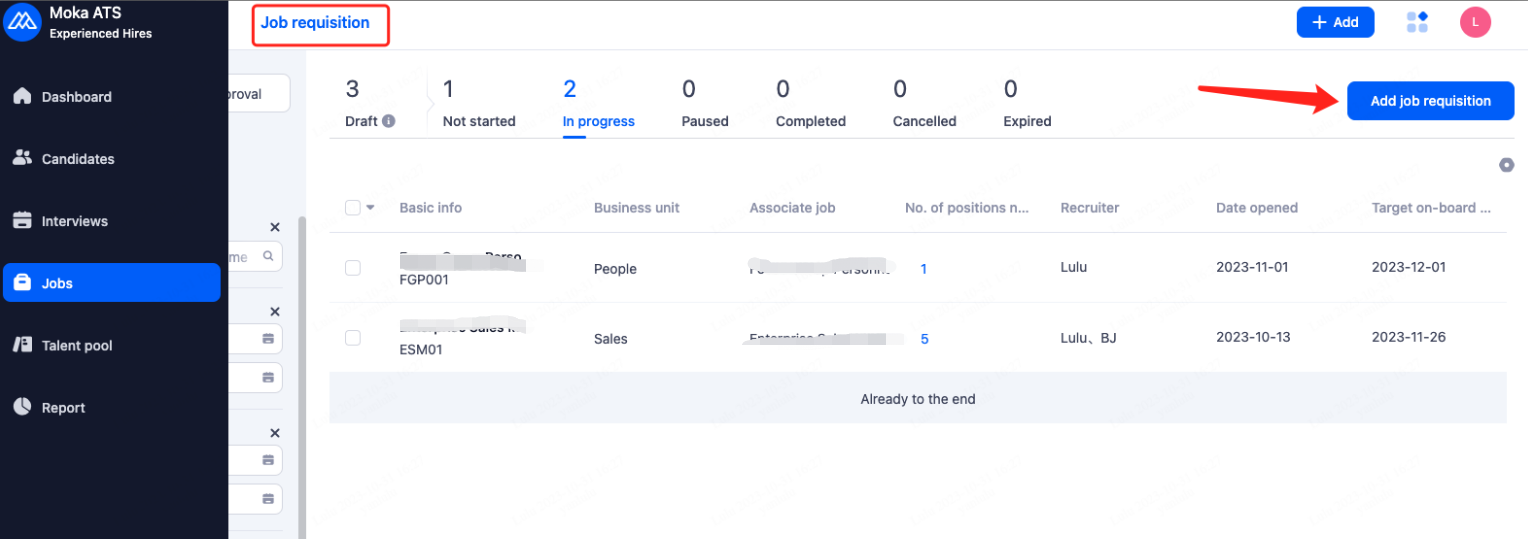
2.Job Requisition
2.1.Create Job Requisition
Step 1: Fill in Basic Information
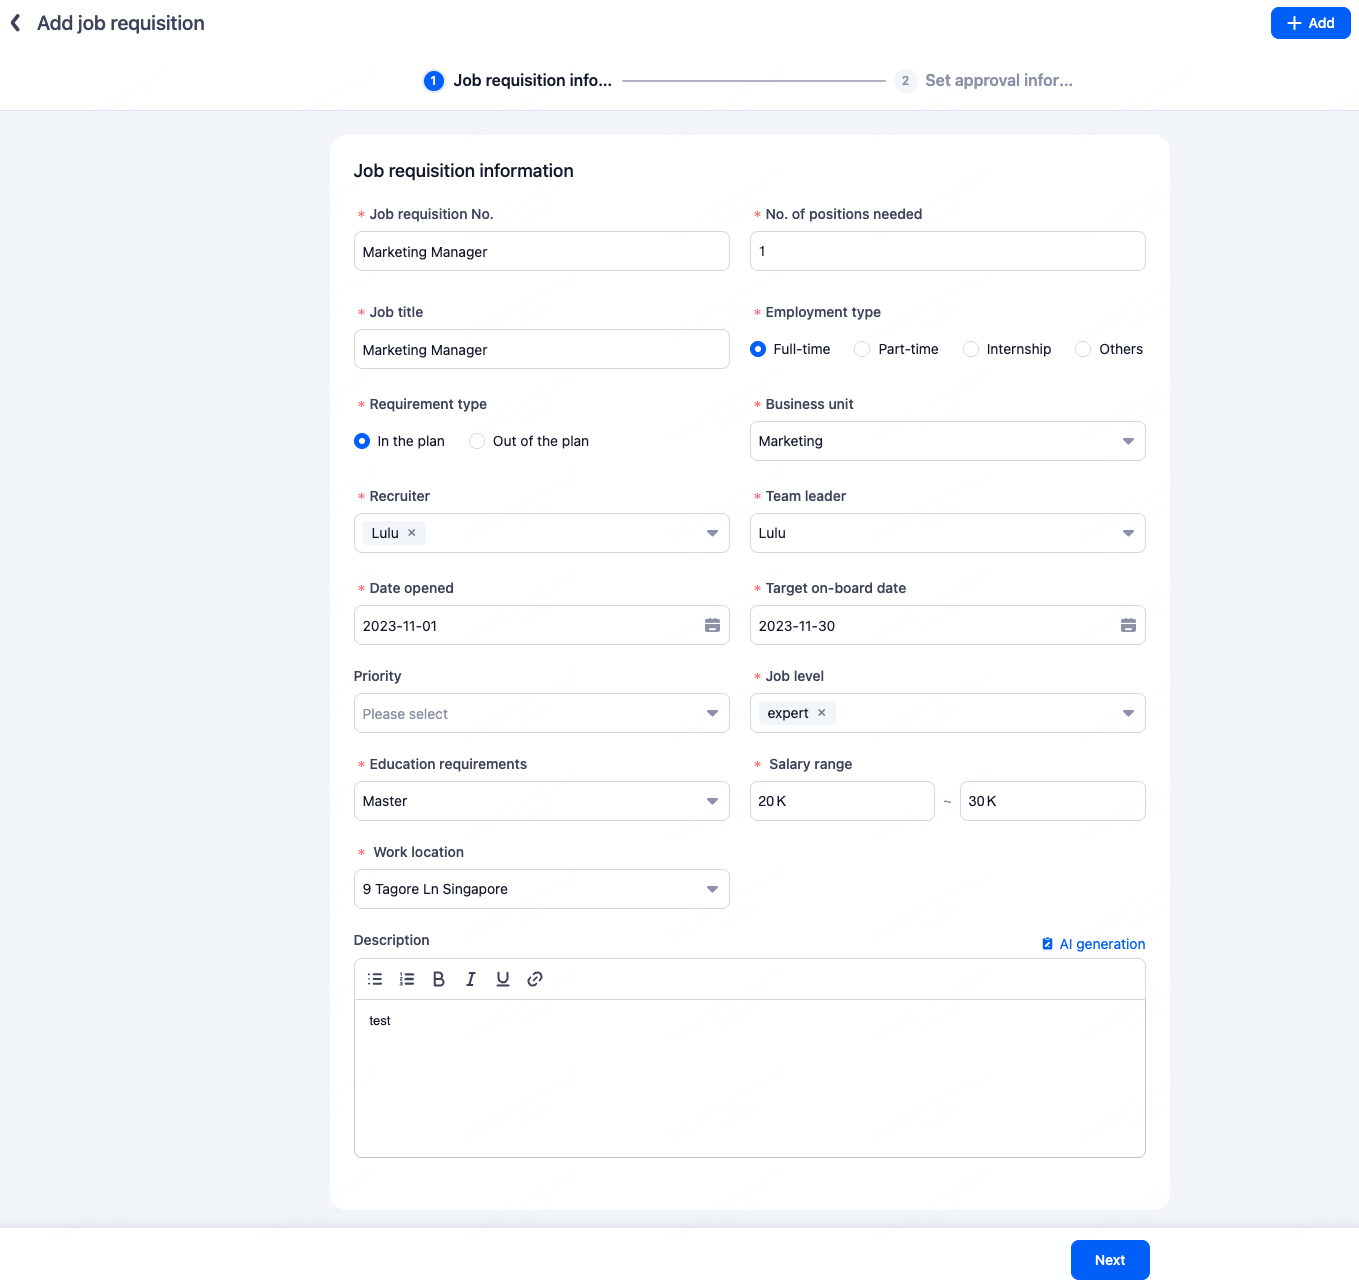
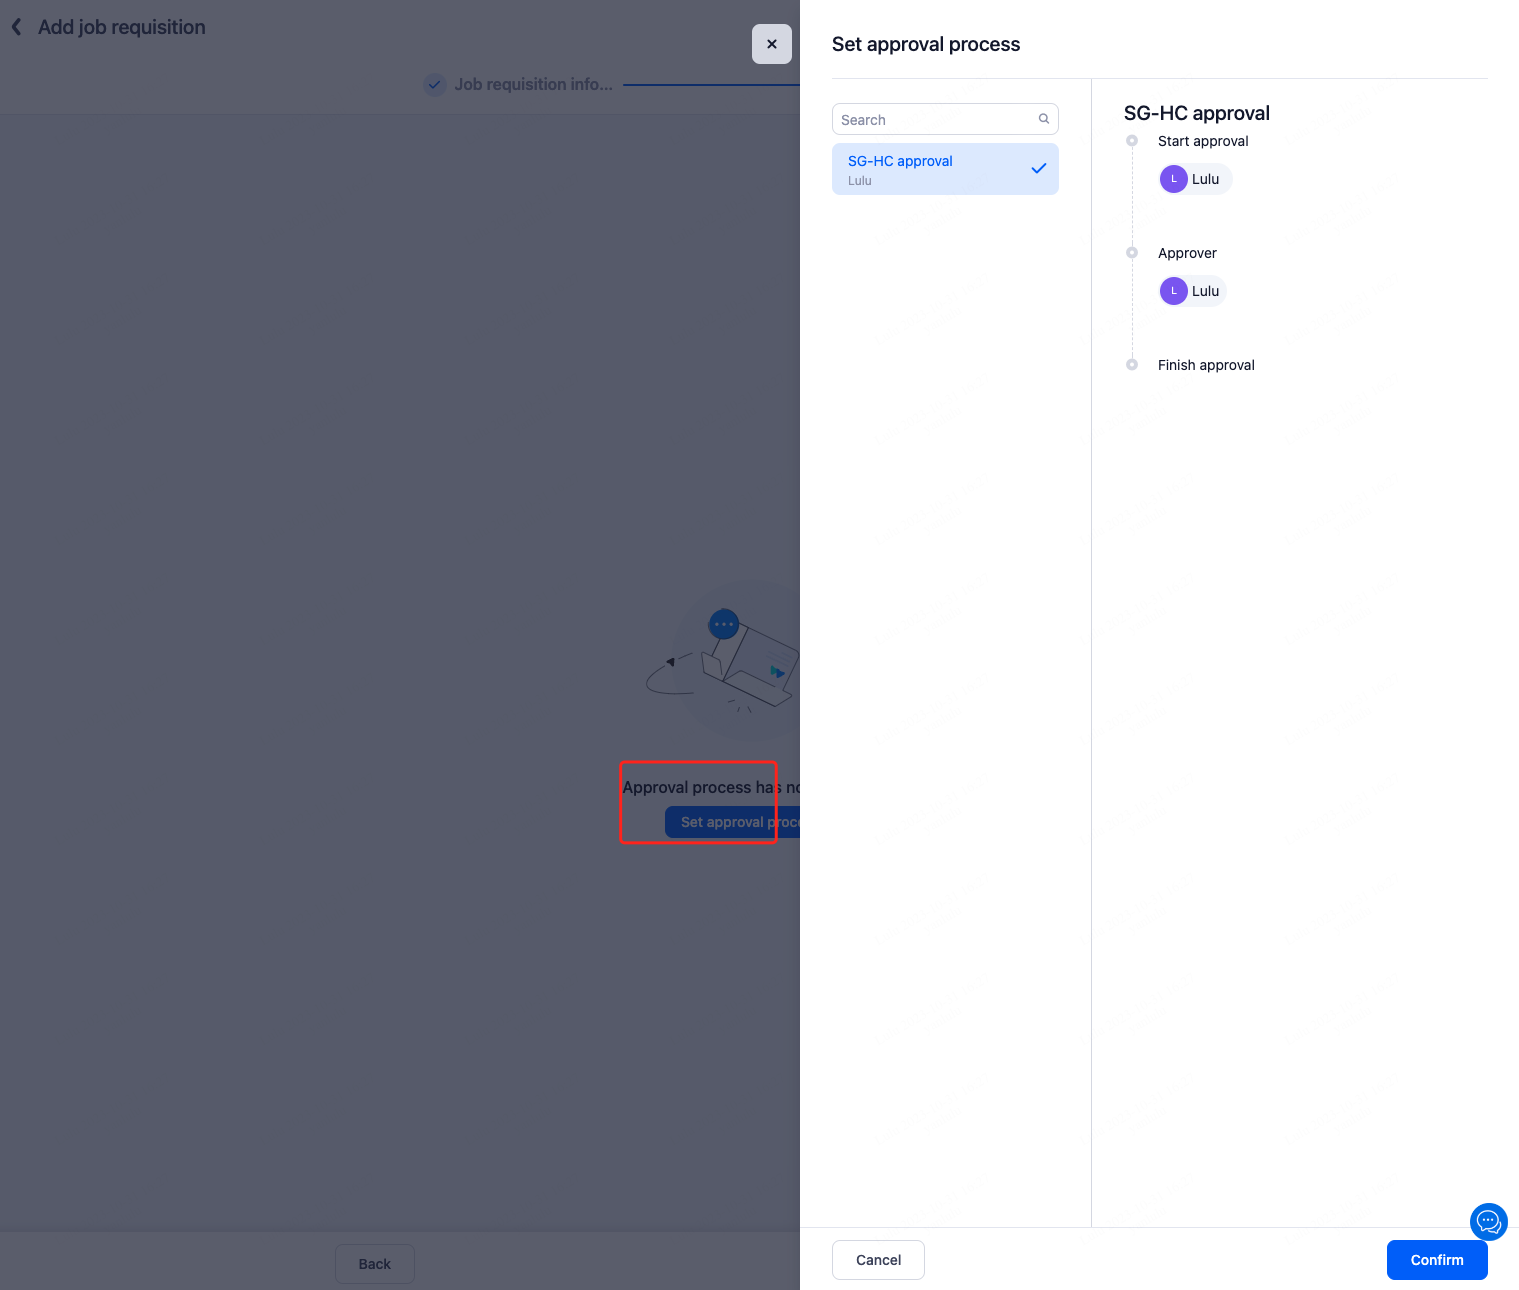
Step 2: Associate approval workflow
If the job requisition approval is enabled, you will need to associate the corresponding approval workflow when creating the requirement.
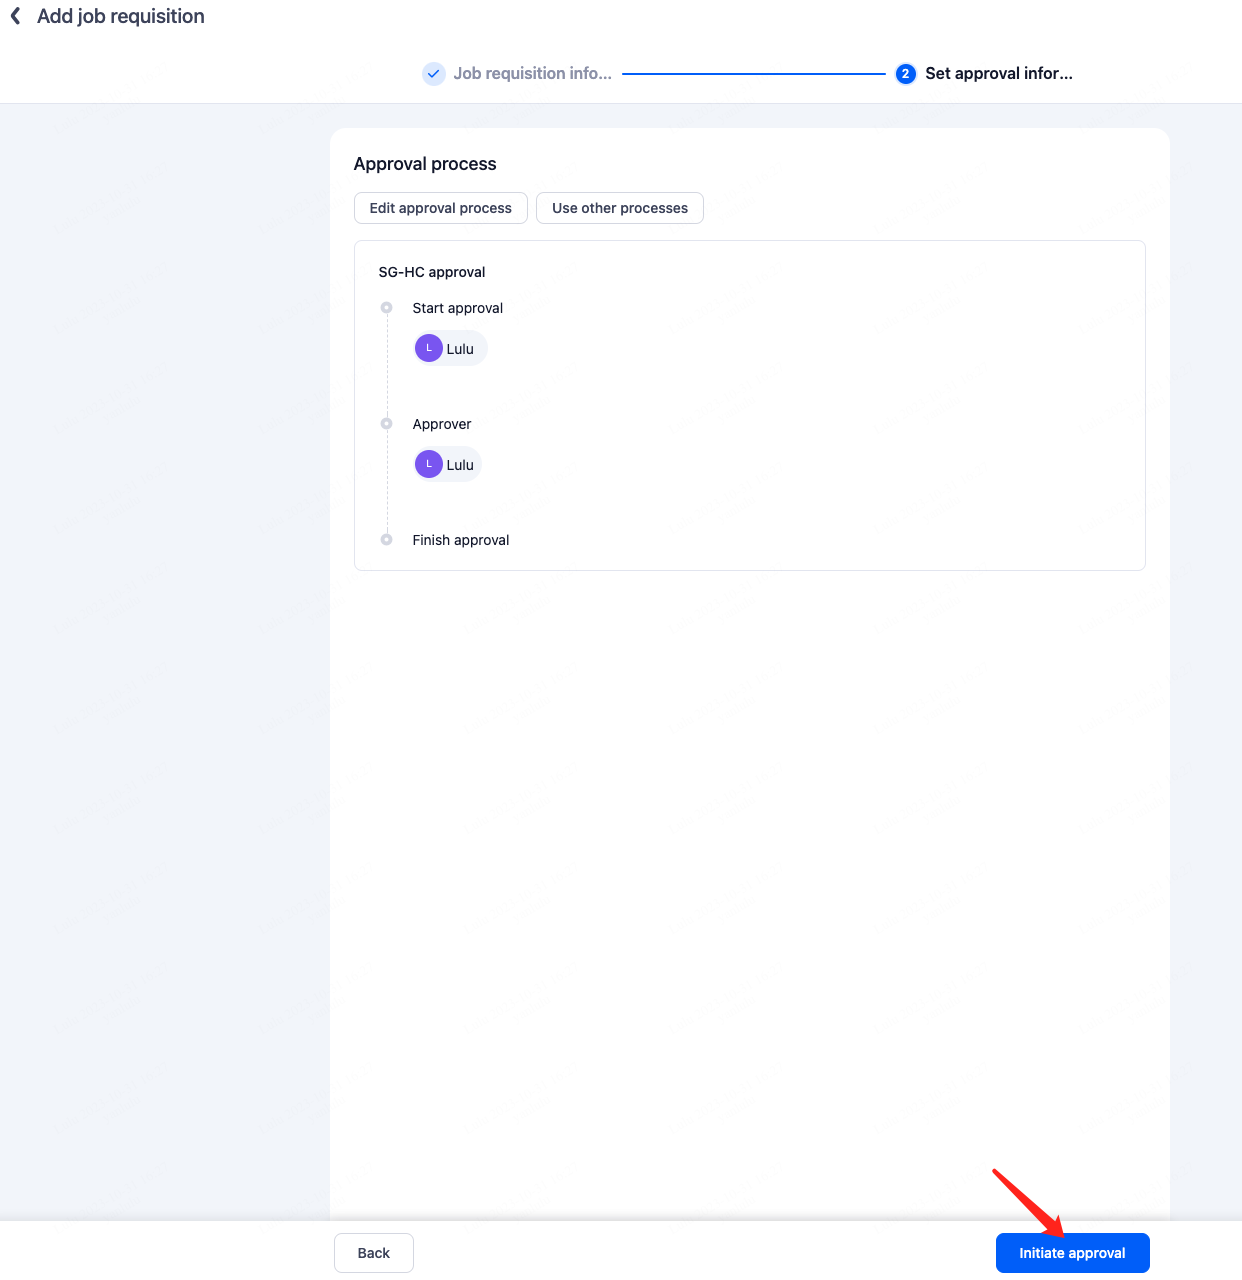
Step 3: Initiate approval workflow
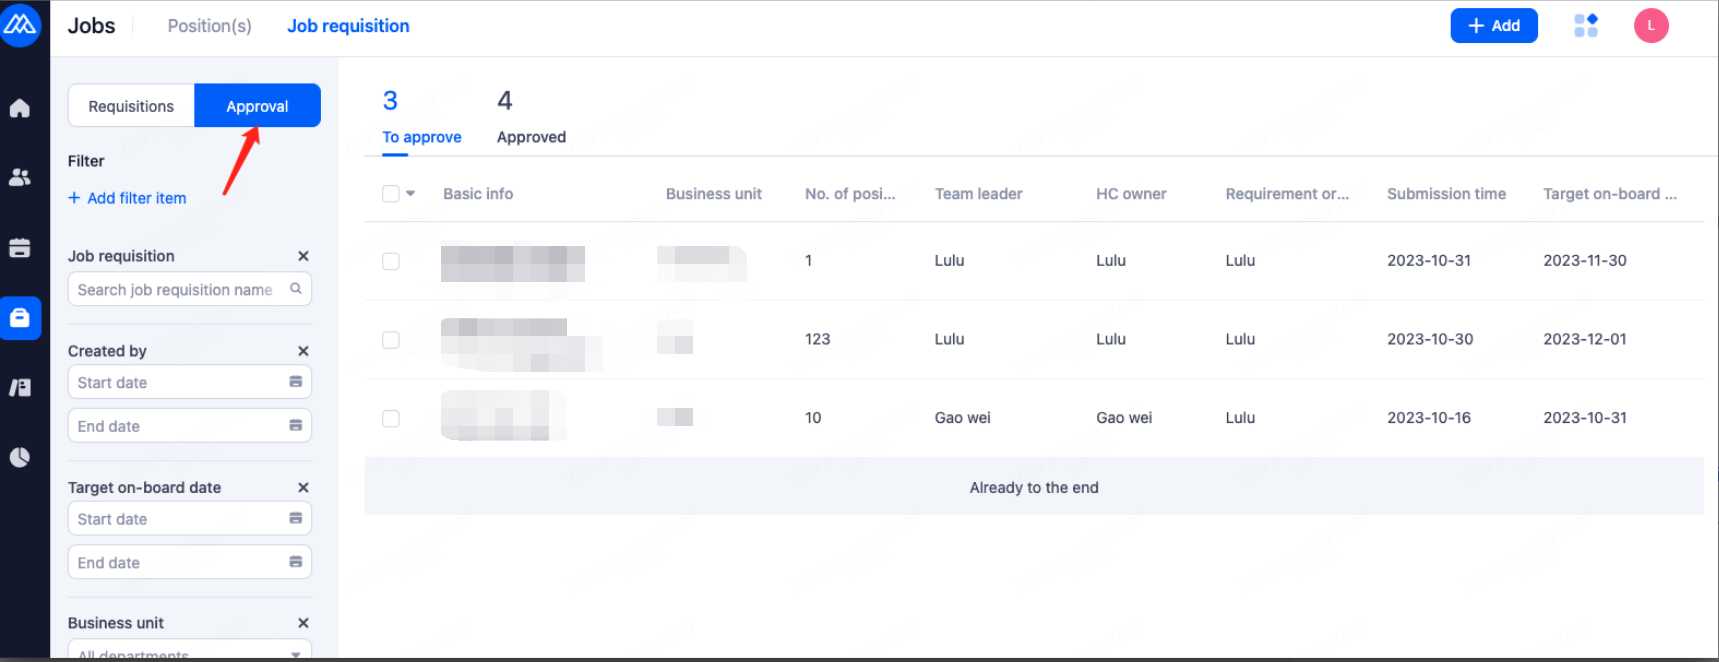
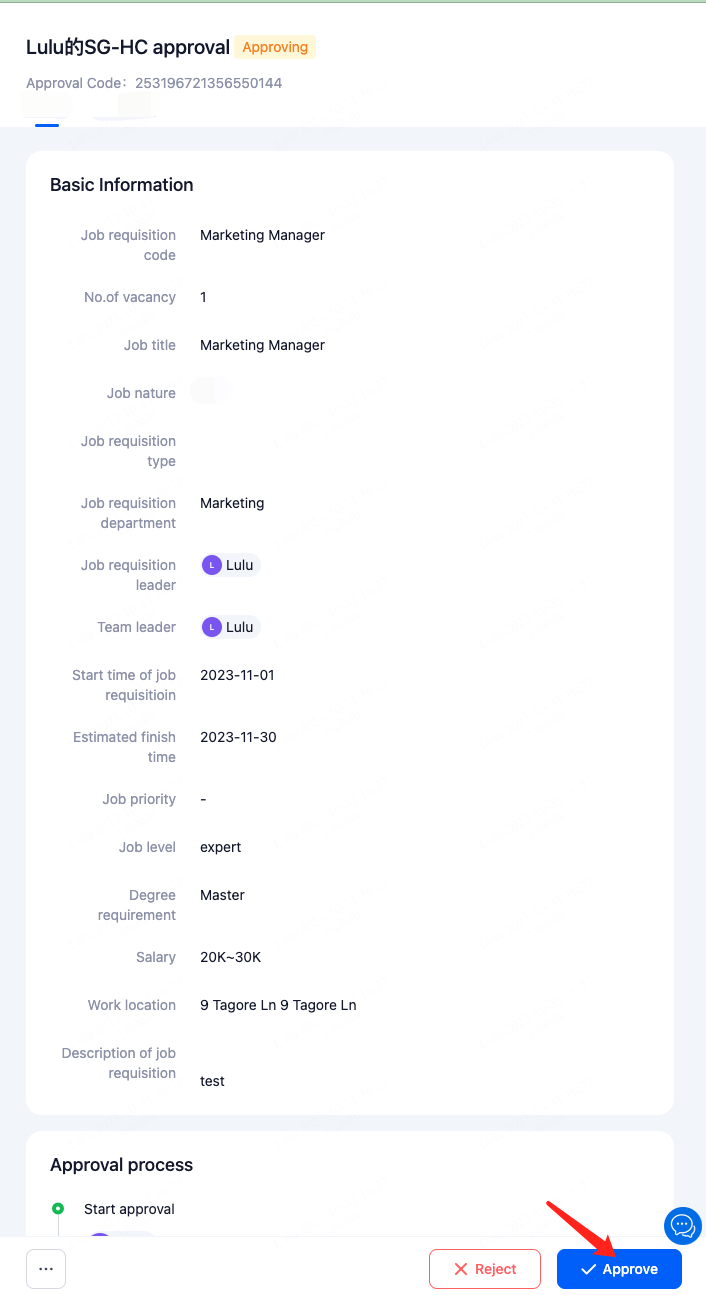
2.2.Approve Job Requisition
As an approver, you will receive an email notification. Clicking on "Approve" will directly redirect you to the system's operation page.
If your company's IM system is integrated with Moka, you will receive relevant notification reminders within the IM system.
Alternatively, you can directly access the system to perform the approval.
On the "Job Requisition Management" page, open the "Approval " section to view pending job requirements for your approval.
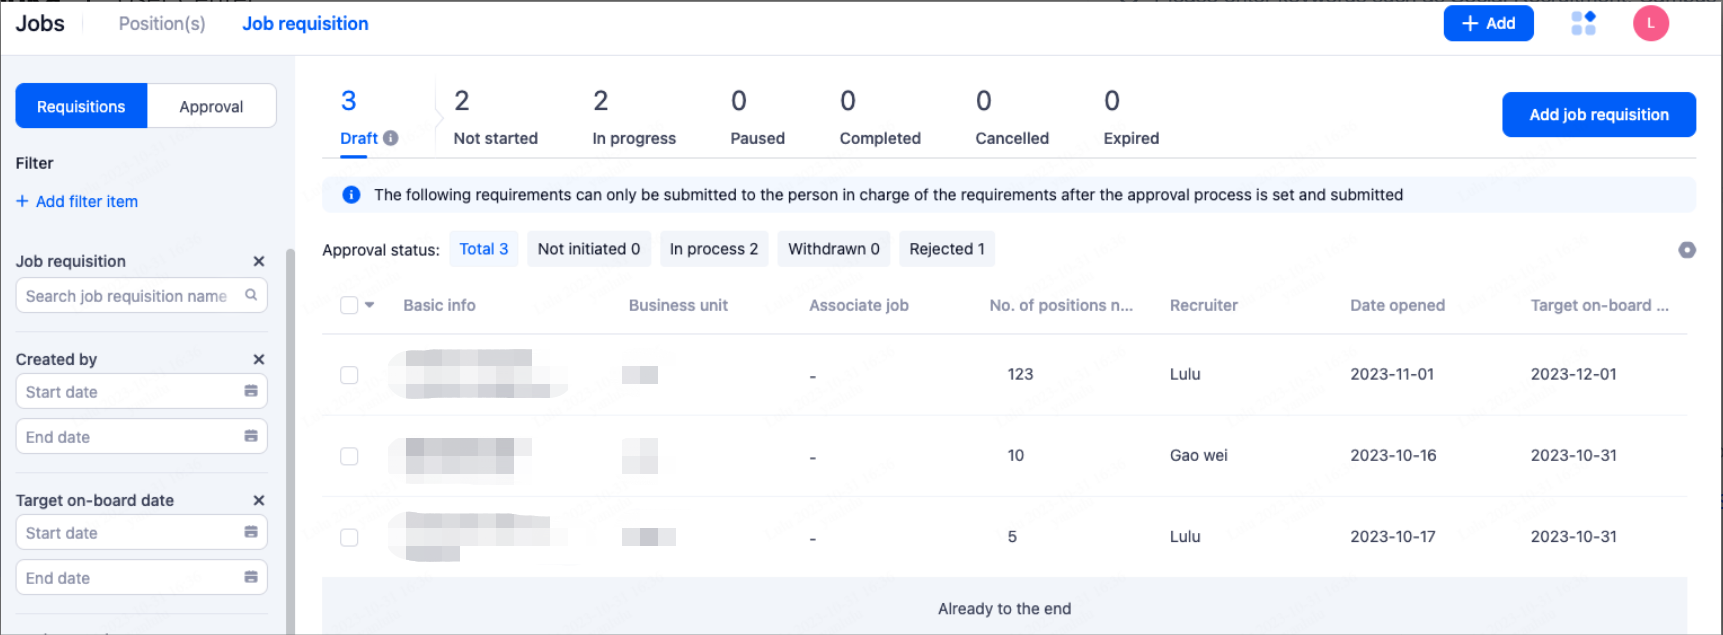
2.3.View Job Requisition Status
Job requisitions that have been initiated for approval but are not yet approved or have been rejected can be viewed in the 'Draft' page.
3.Job
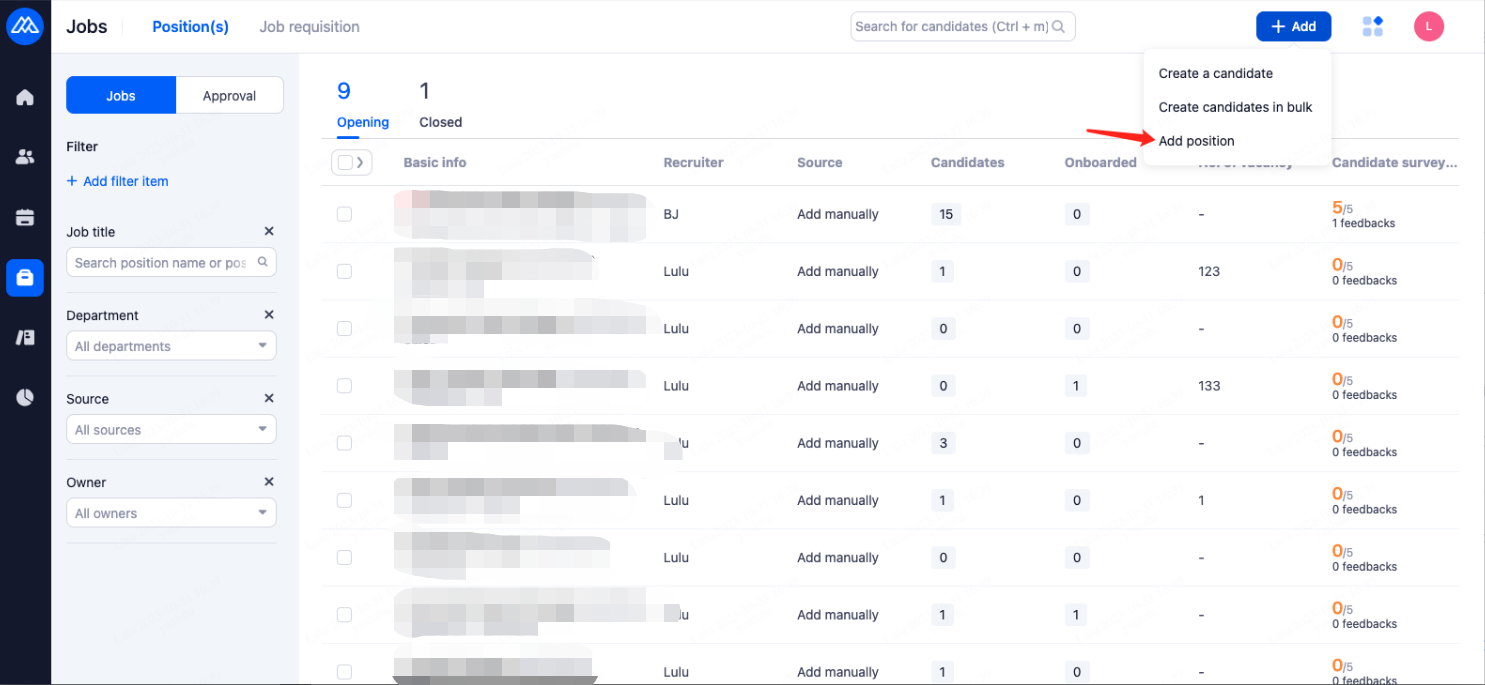
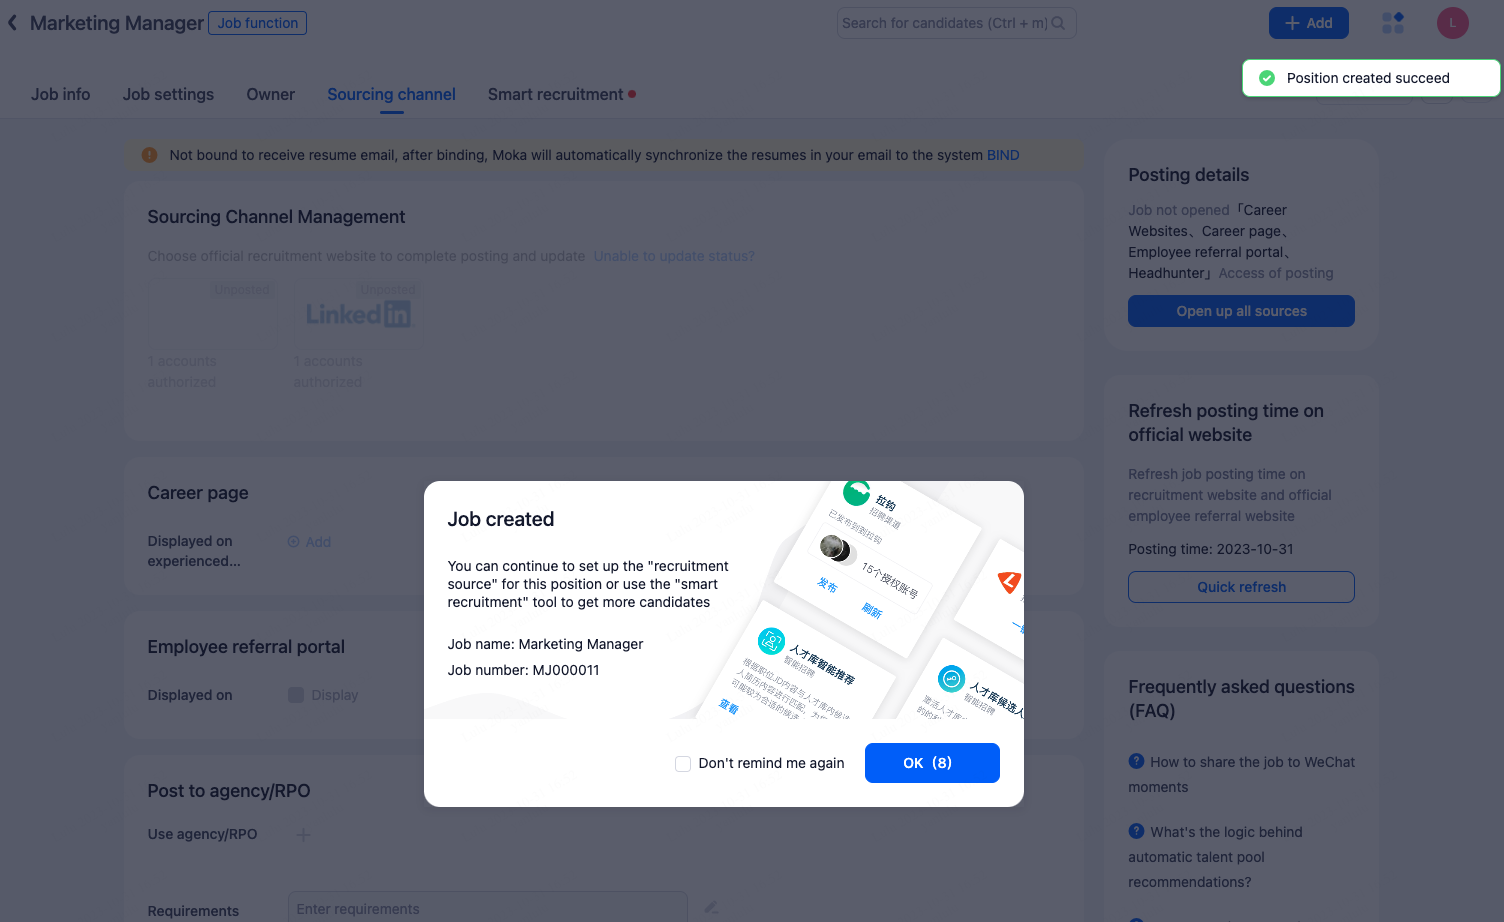
3.1.Create Job
Once the job requisition is approved, you can directly create the position.
Position Creation Entry Point ①
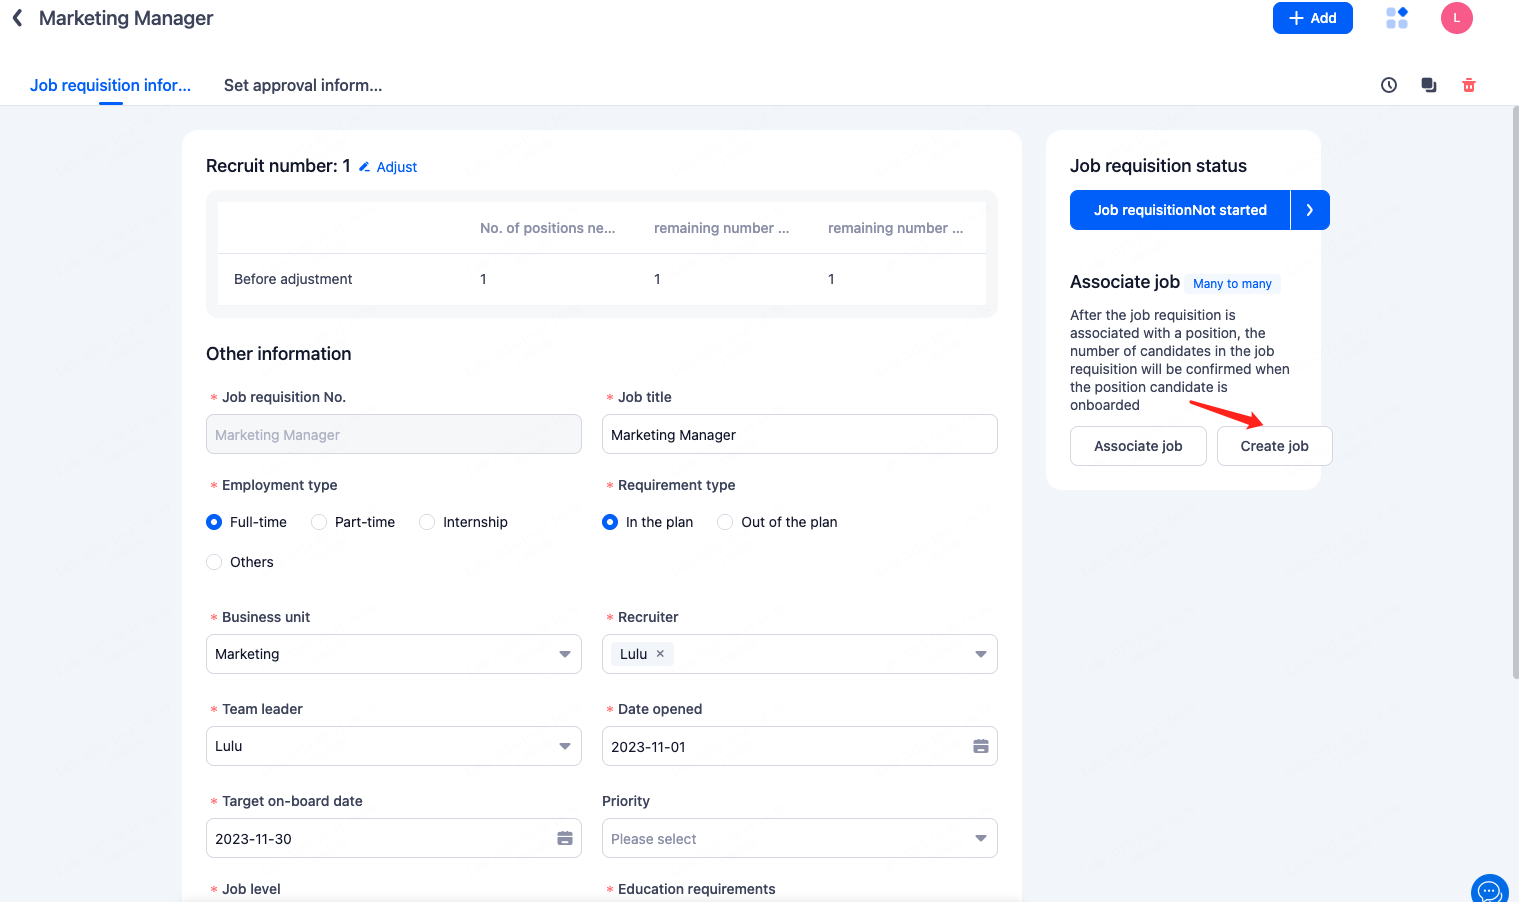
Position Creation Entry Point ②
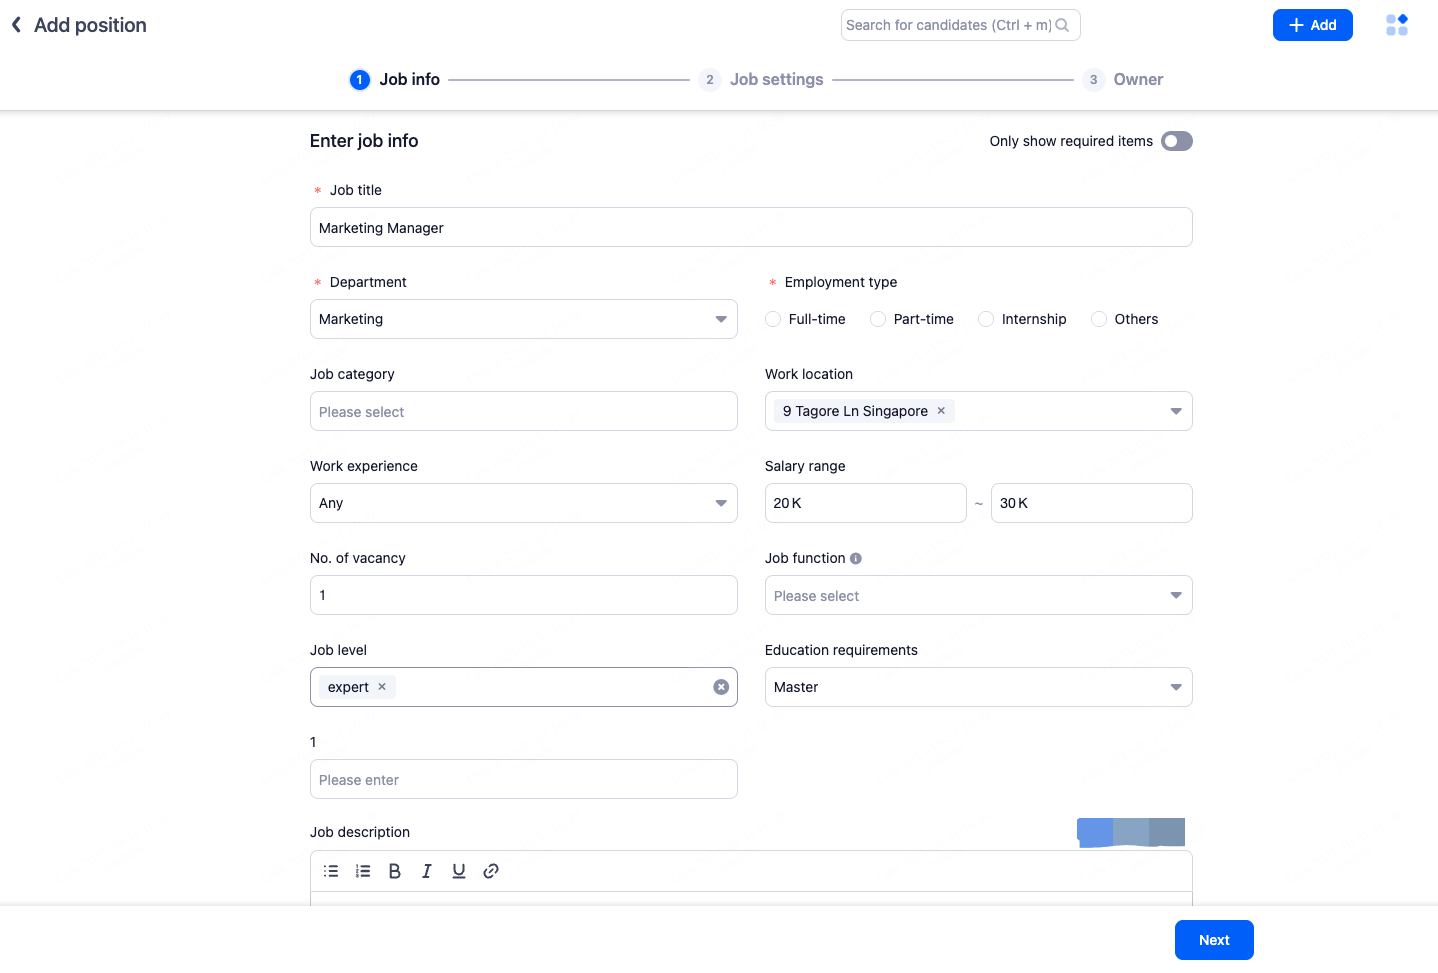
Step 1: Fill in Basic Information
Step 2: Set Job Recruitment Configuration

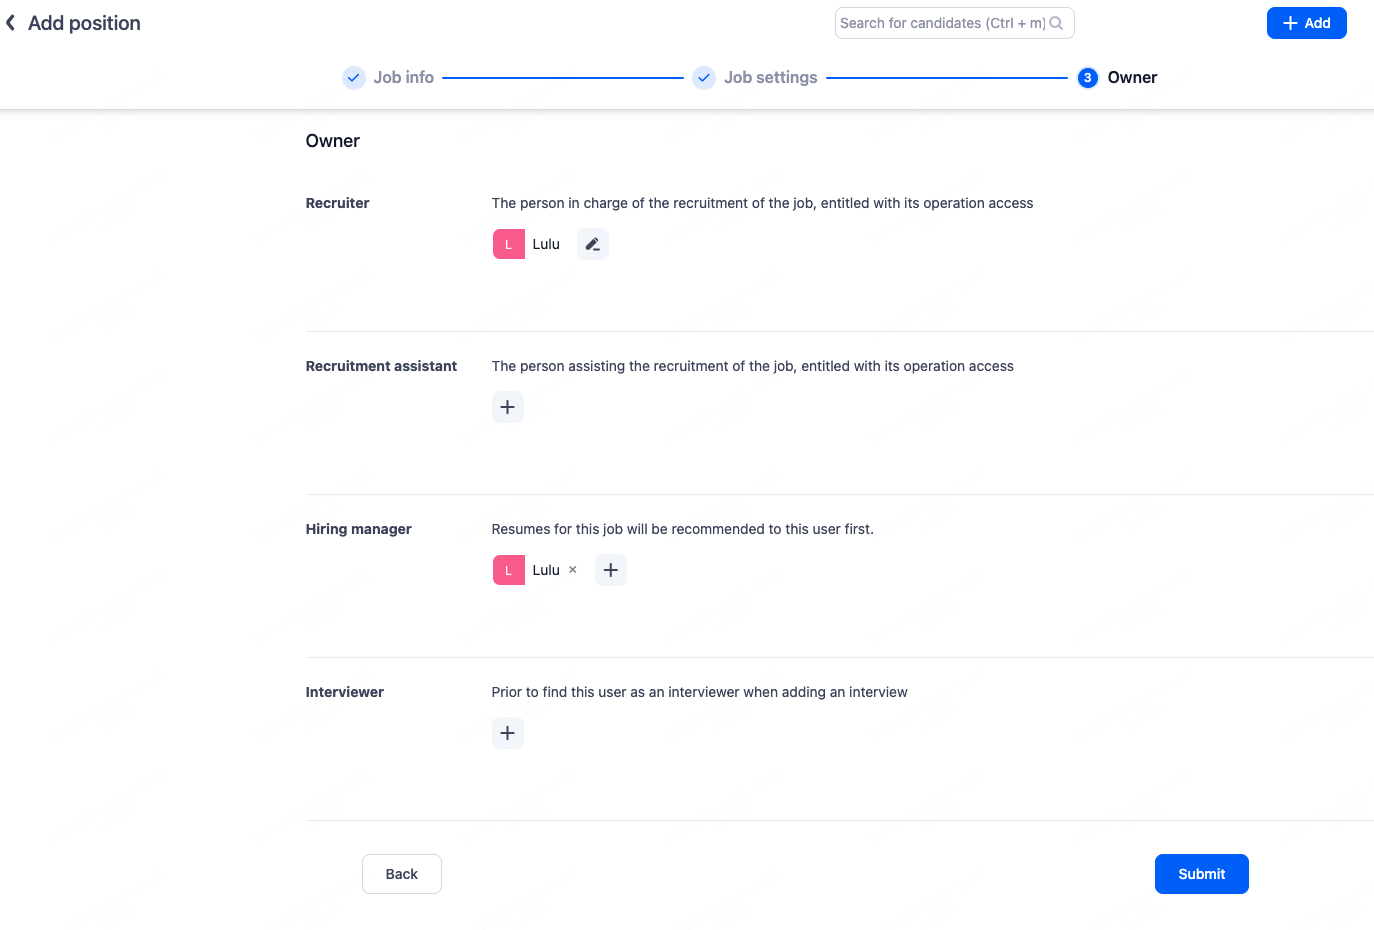
Step 3: Set Job Responsible Personnel
3.2.Post Job
Step 1: Open up all sources

Step 2: Post Job to Relevant Channel
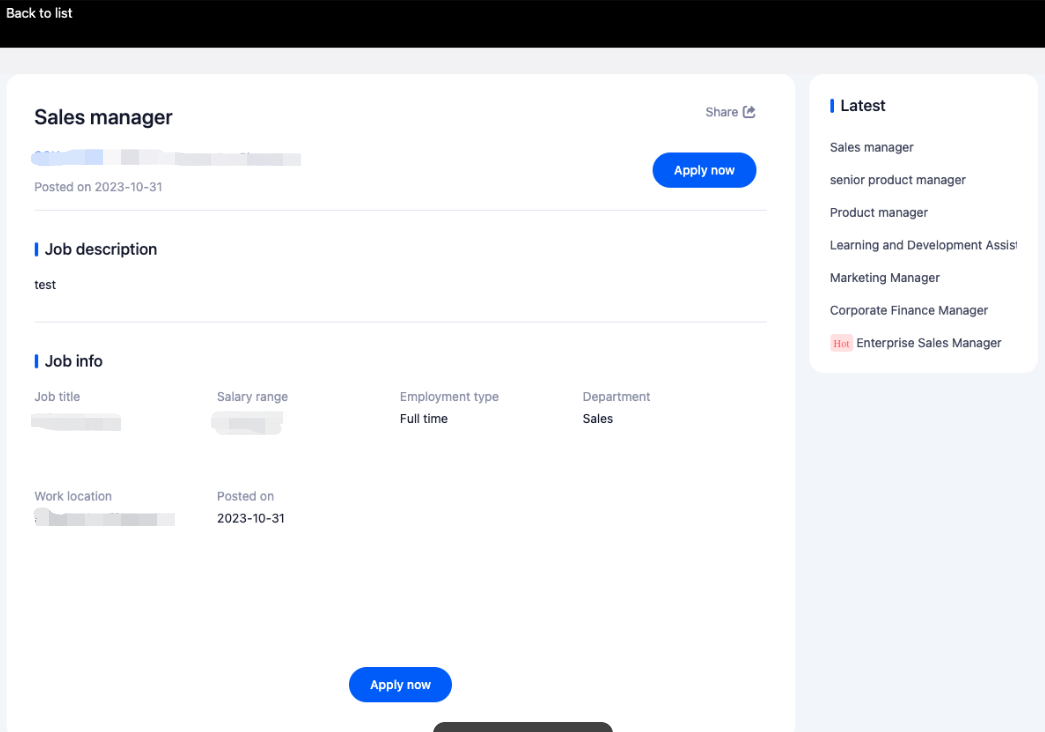
3.2.1.Career page
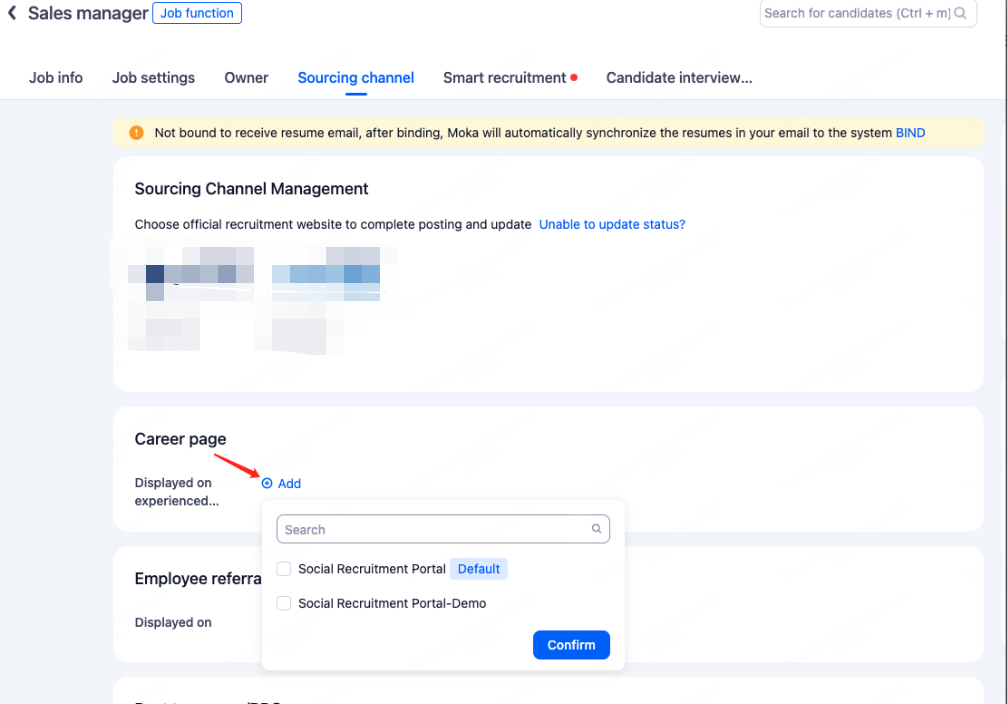
The image below depicts the display effect of the job posting on the career page.
3.2.2.Linkedin
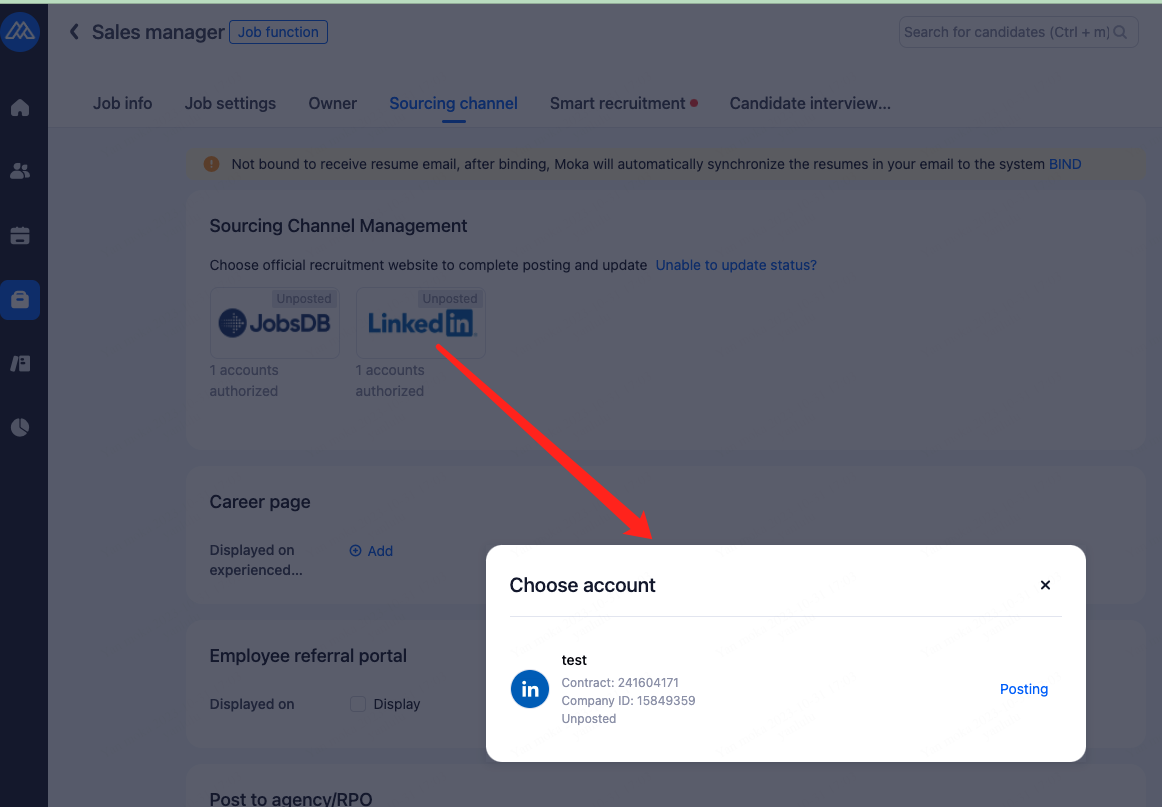
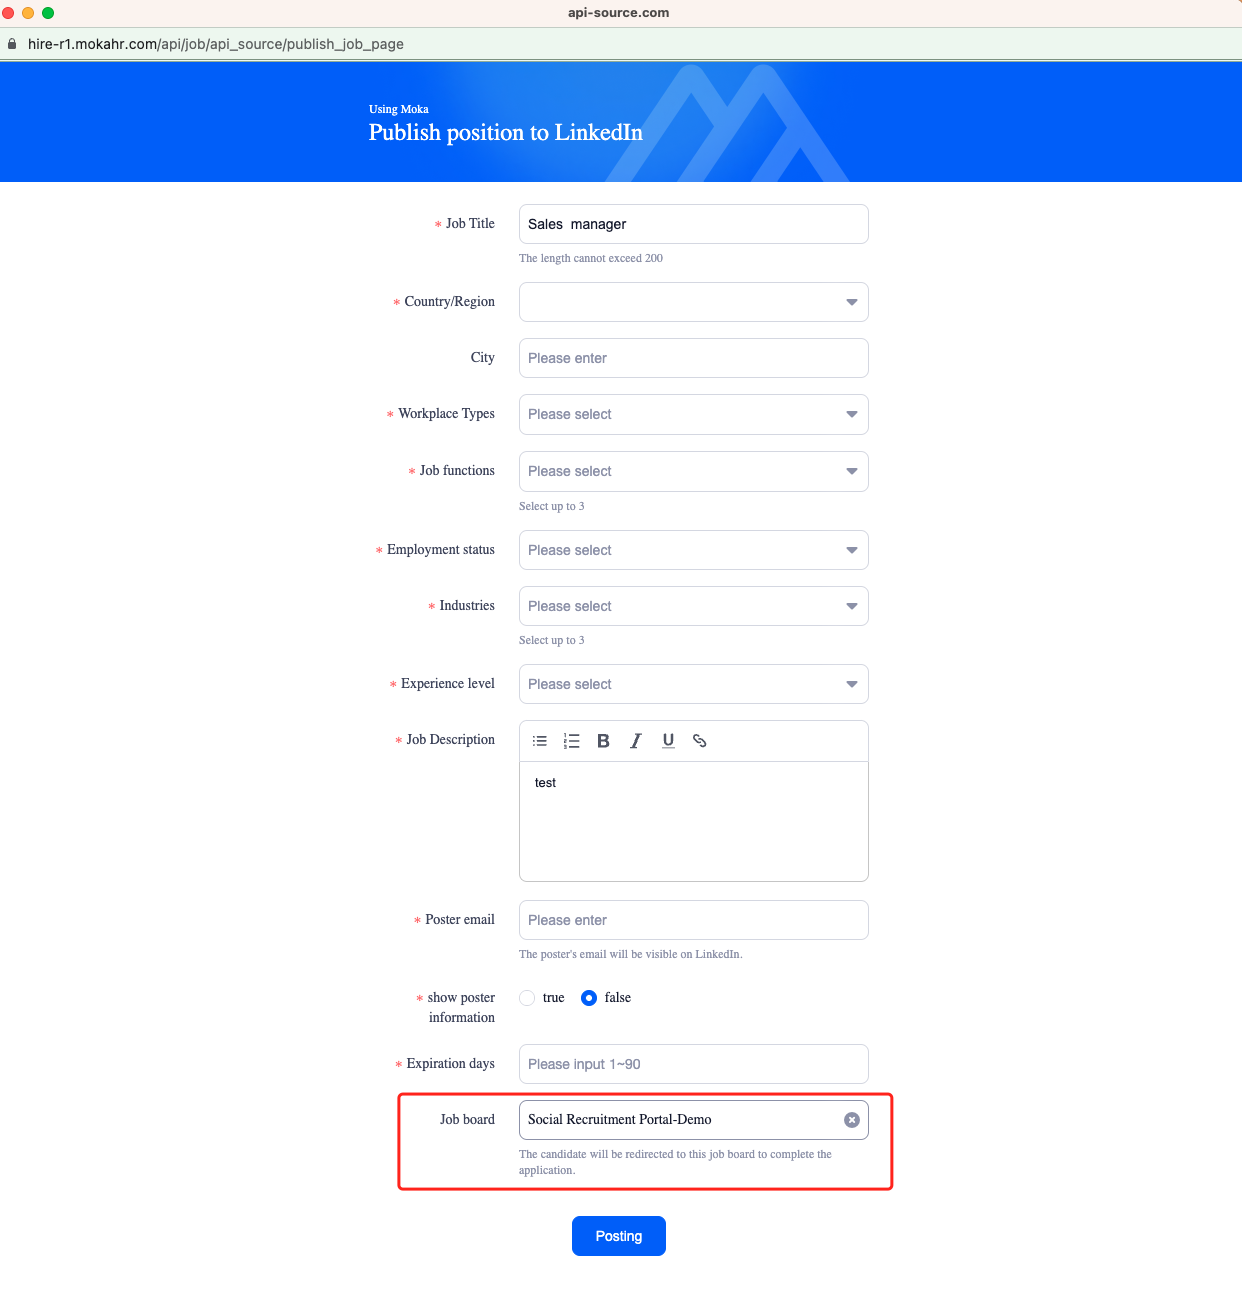
"Job board" must be selected as the Career page, so that when candidates apply through LinkedIn, they will be redirected directly to the Moka career page for easy resume collection.
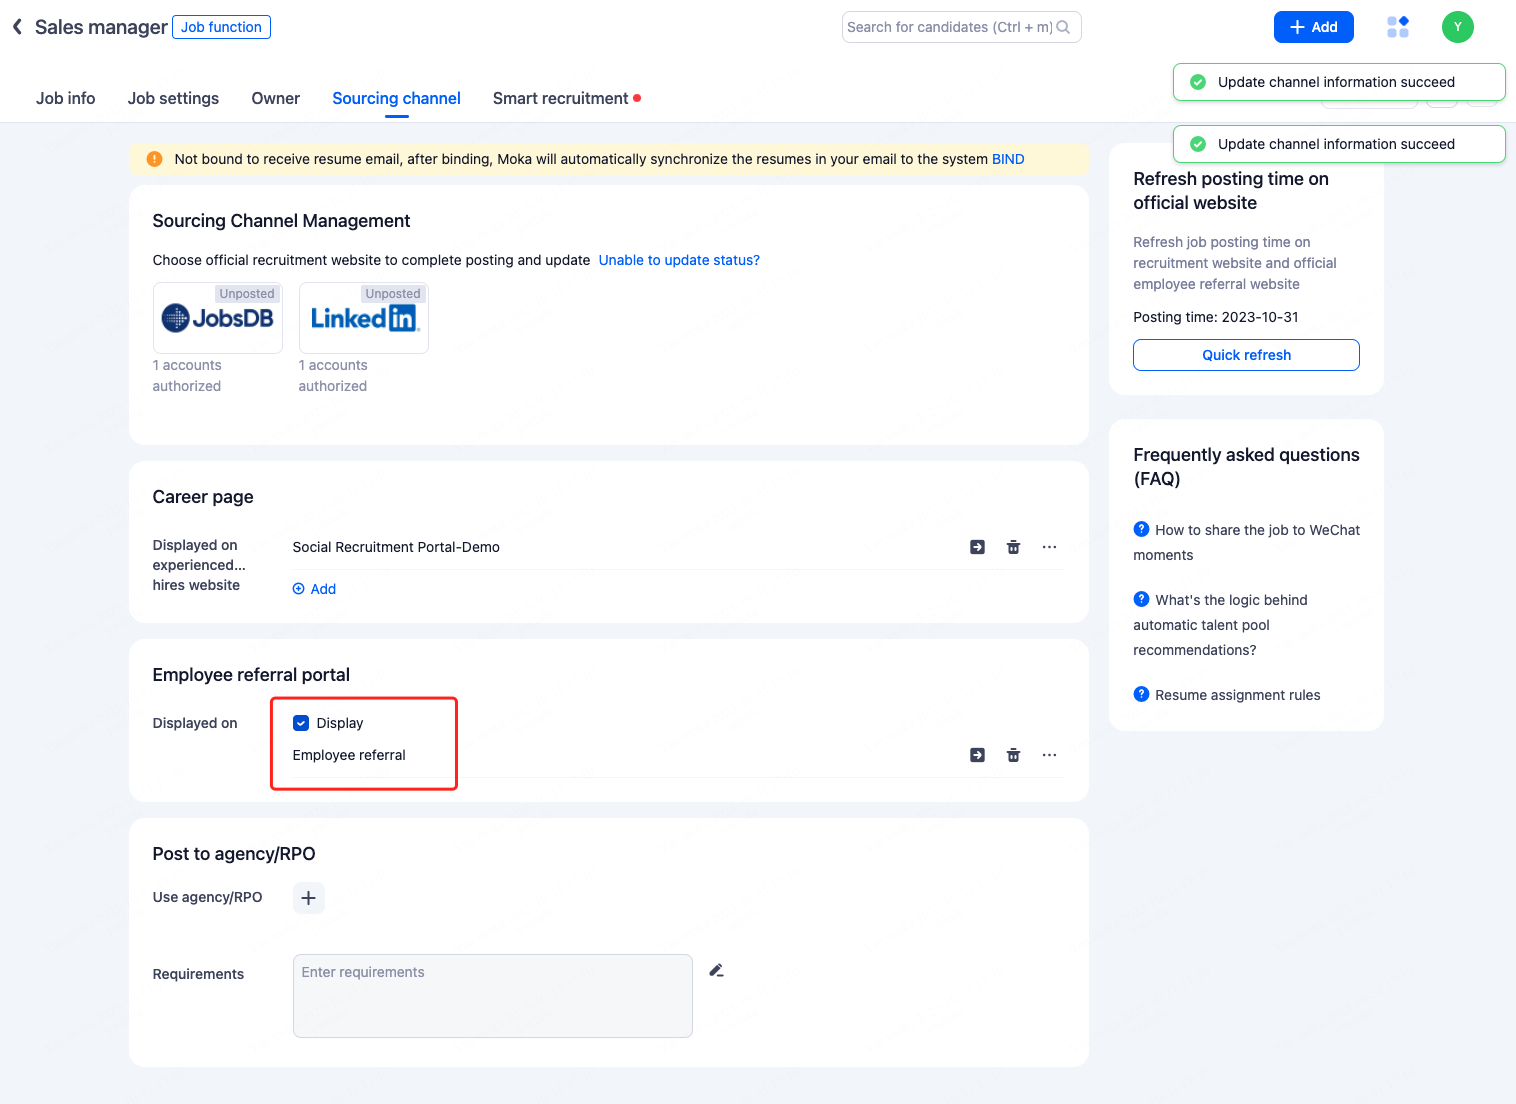
3.2.3.Referral
3.2.4.Agency
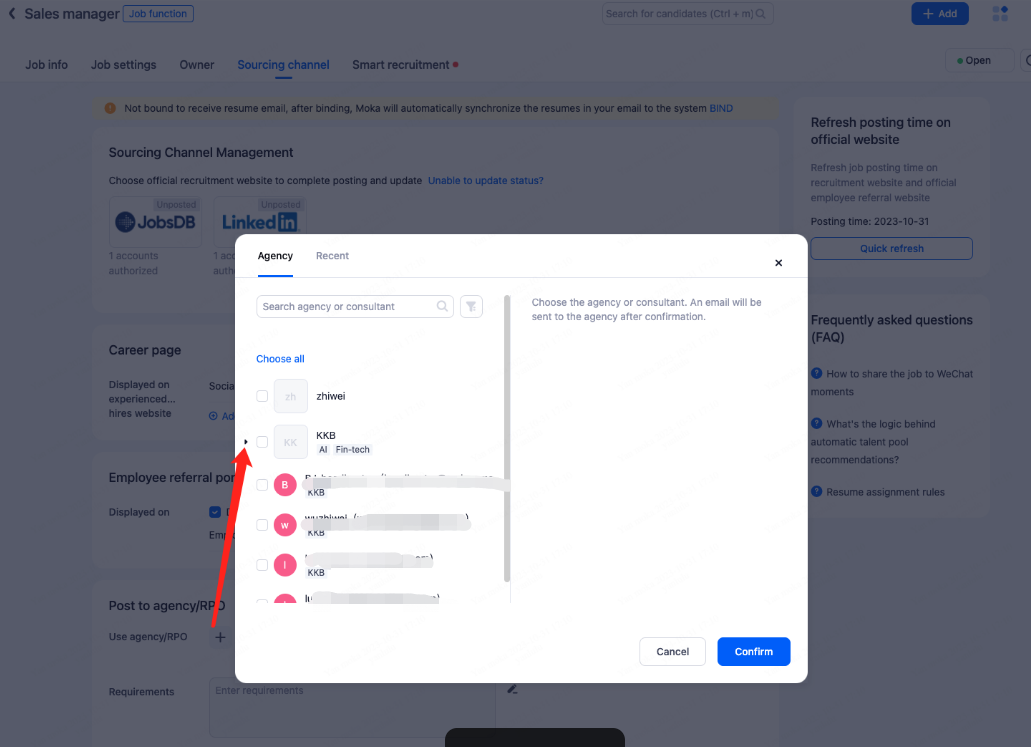
Once the position is made available to headhunters, they will be able to view the job on the Moka Headhunting Platform and recommend candidates for it.
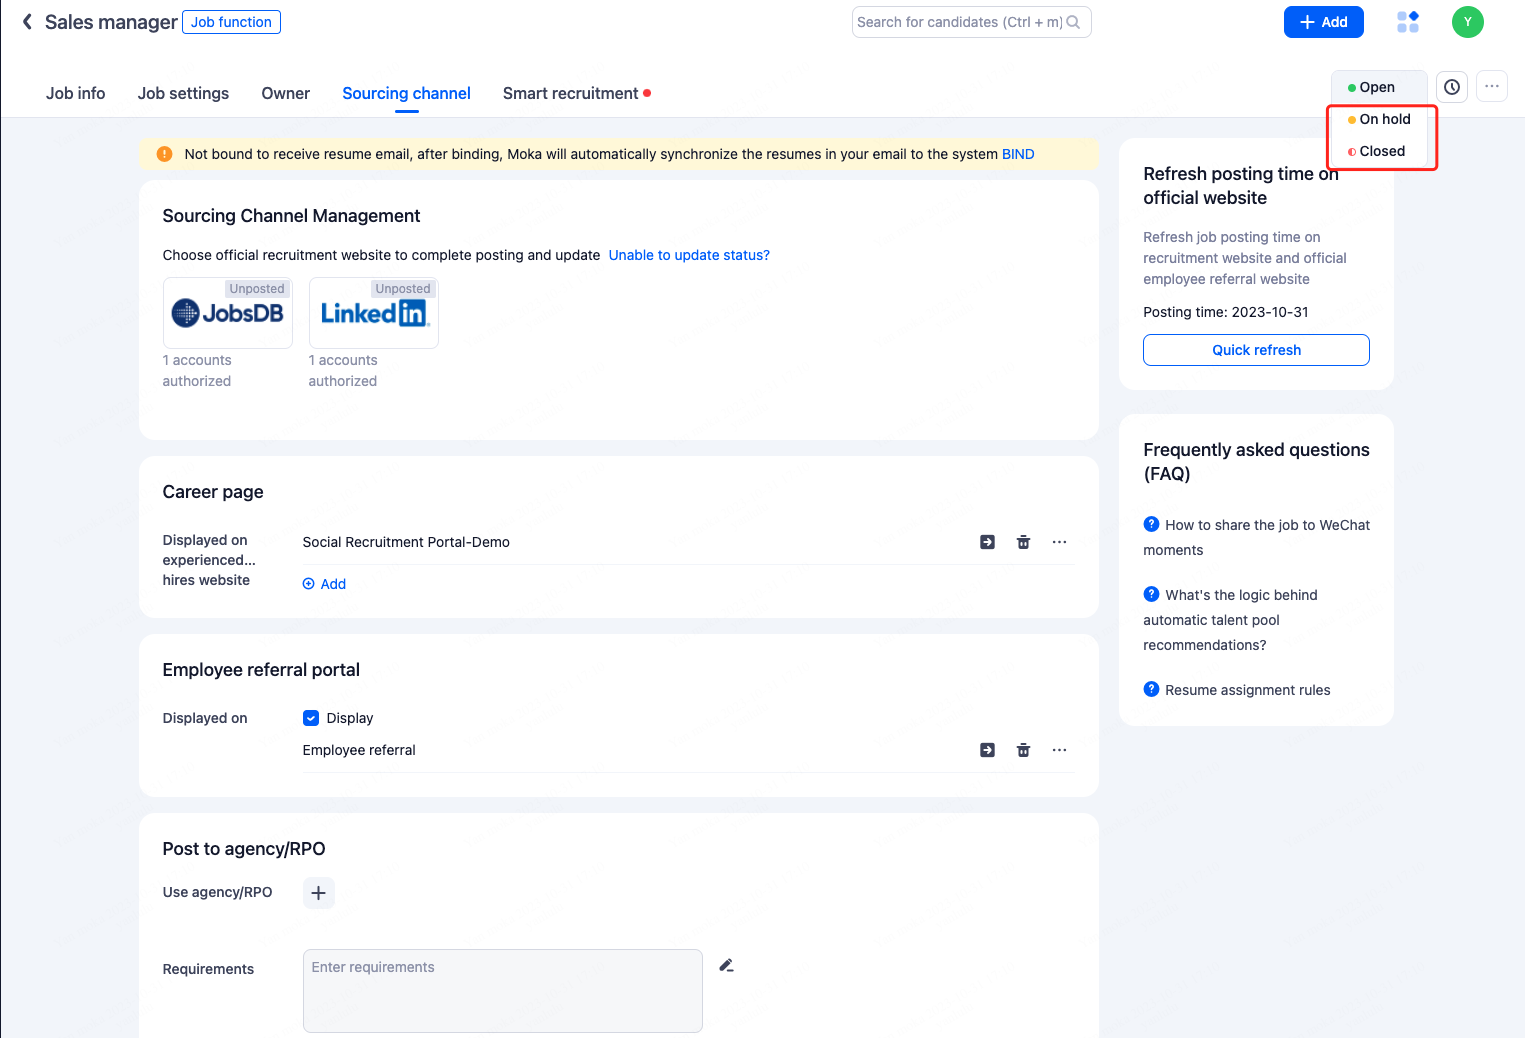
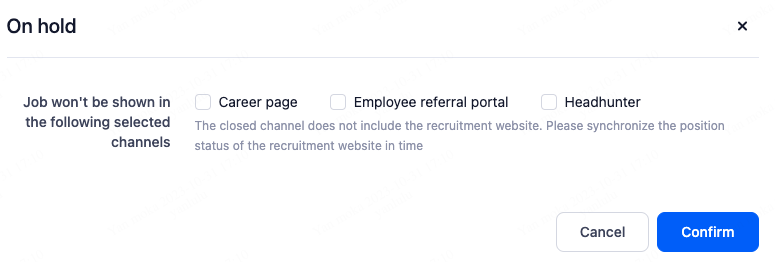
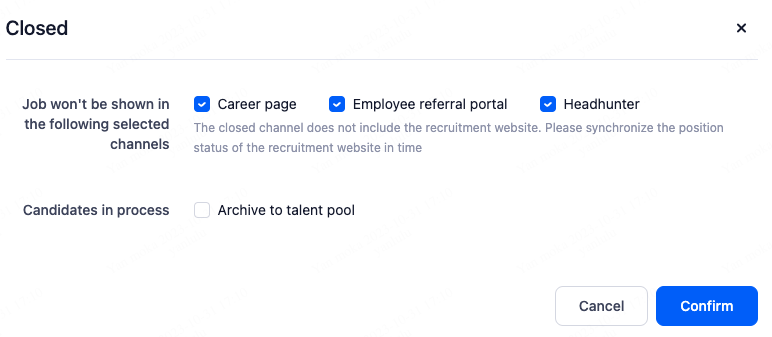
3.3.Pause/Close Job
4.Candidate
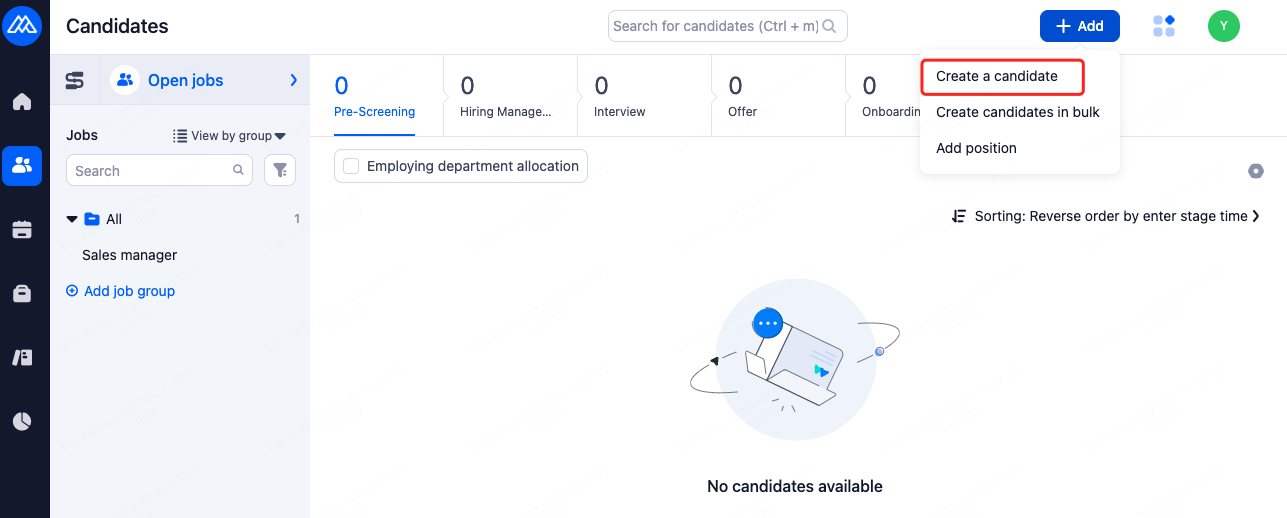
4.1.Creat Candidate
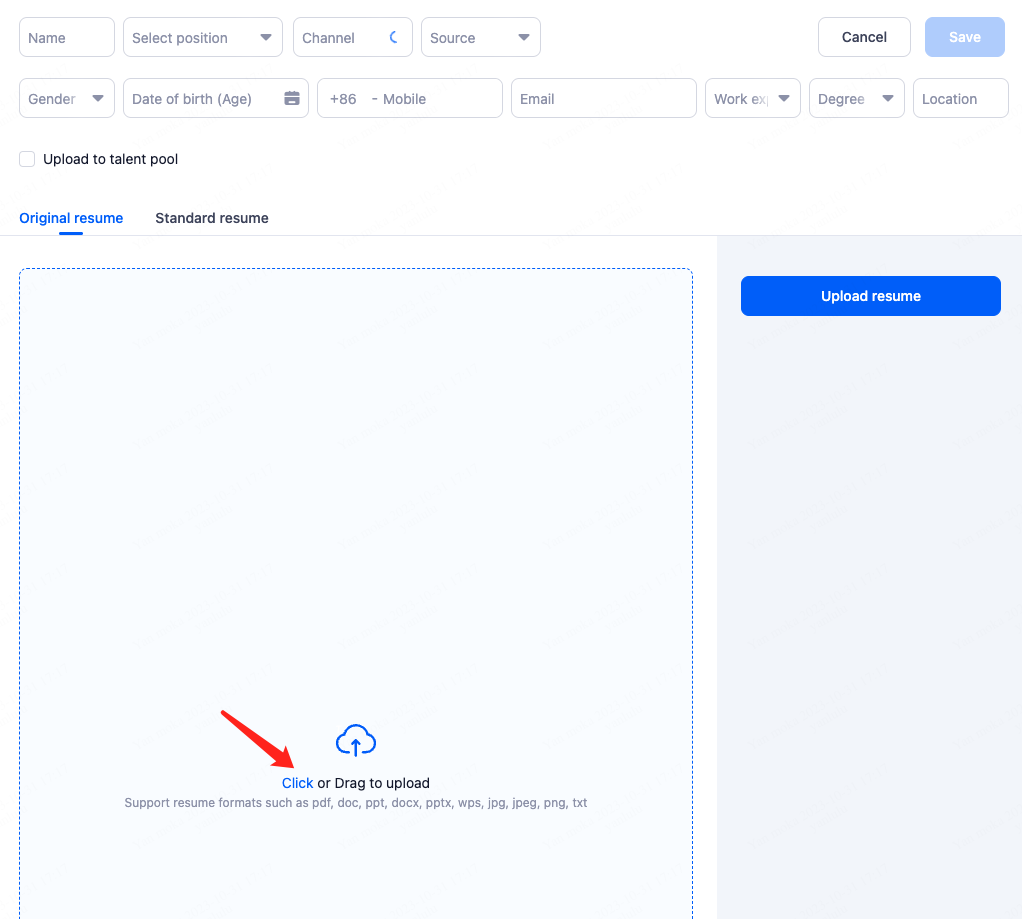
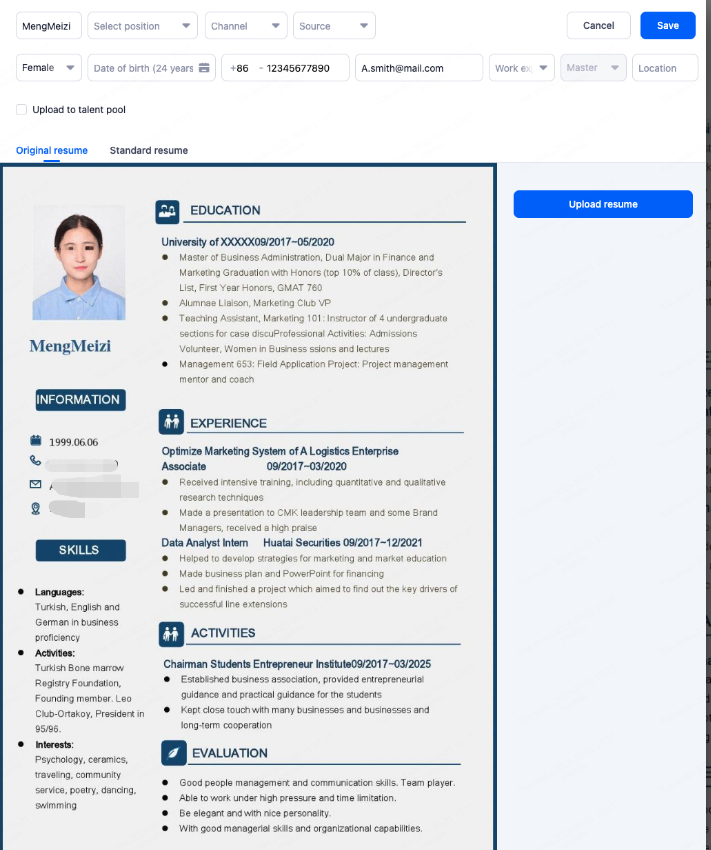
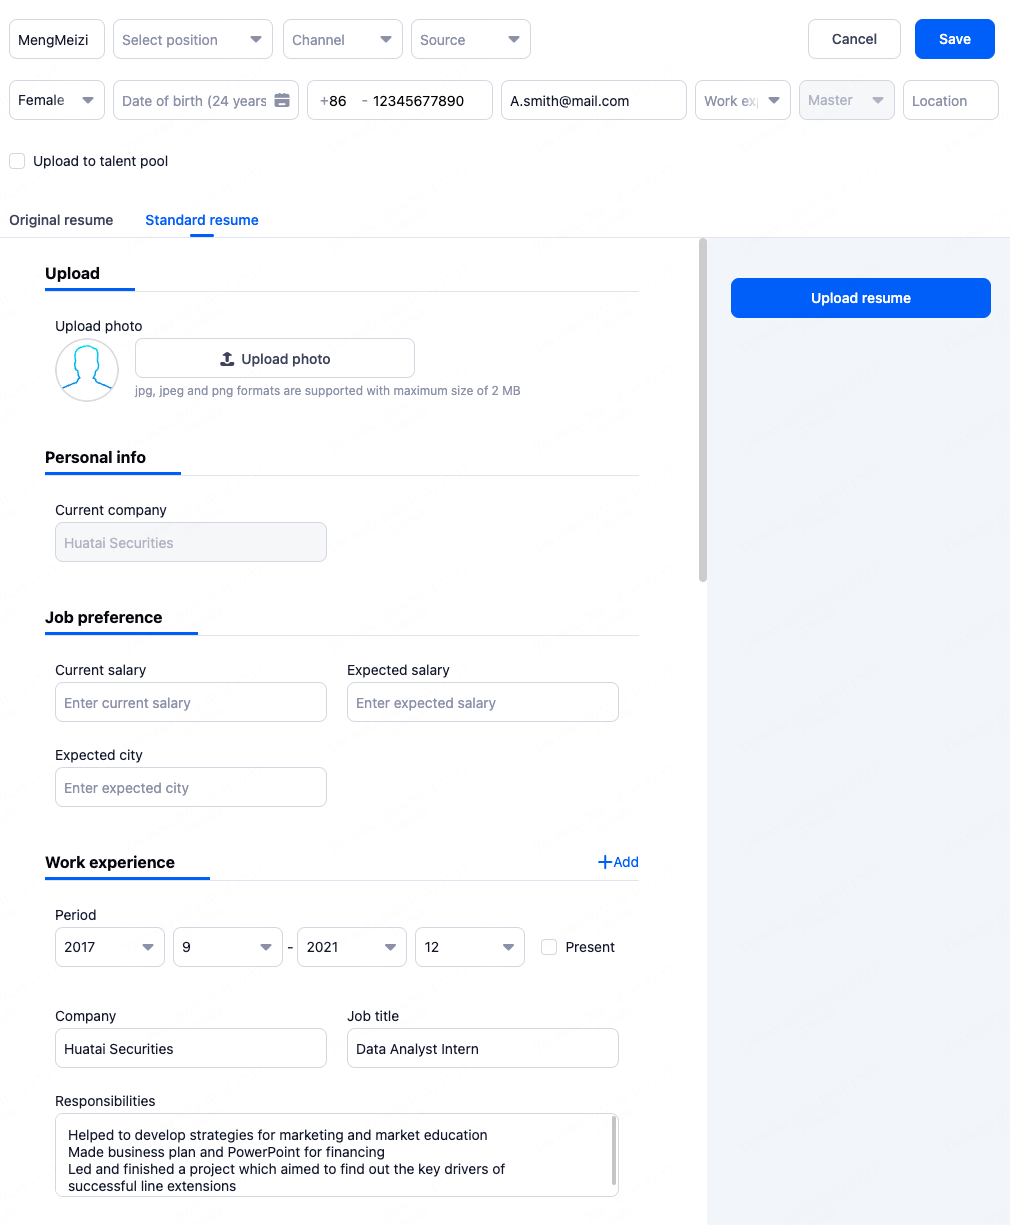
The system will automatically parse the original resume and store the information in the standardized resume.
4.2.Search for Candidates

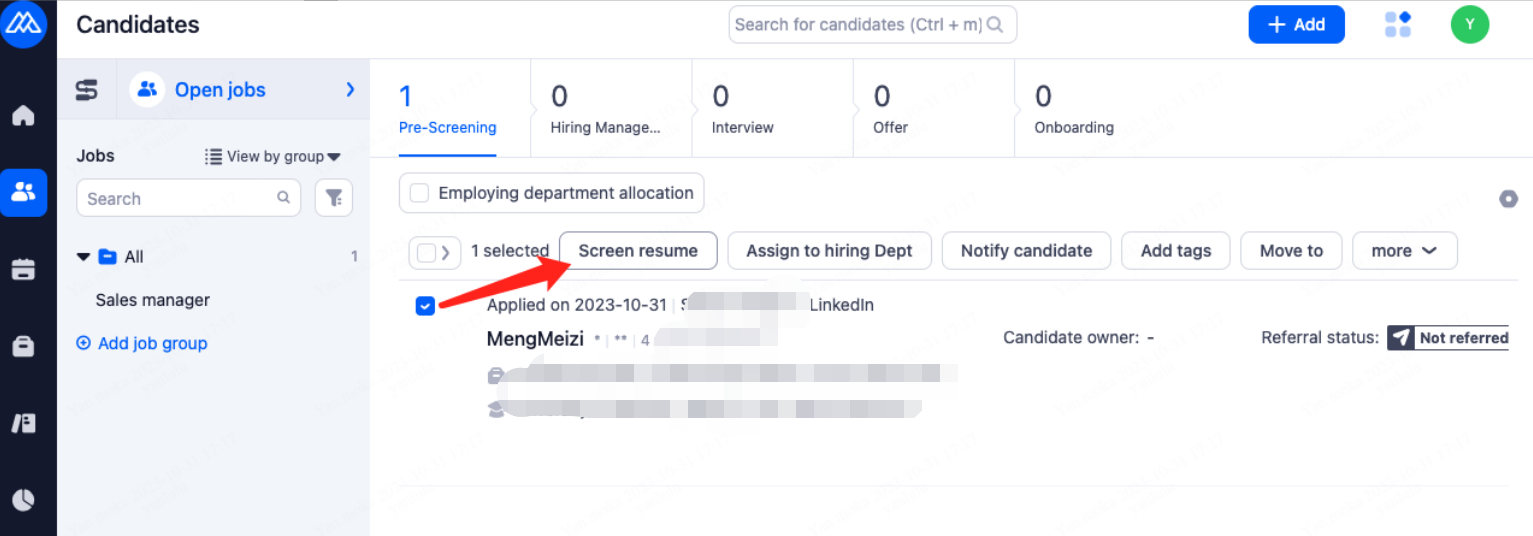
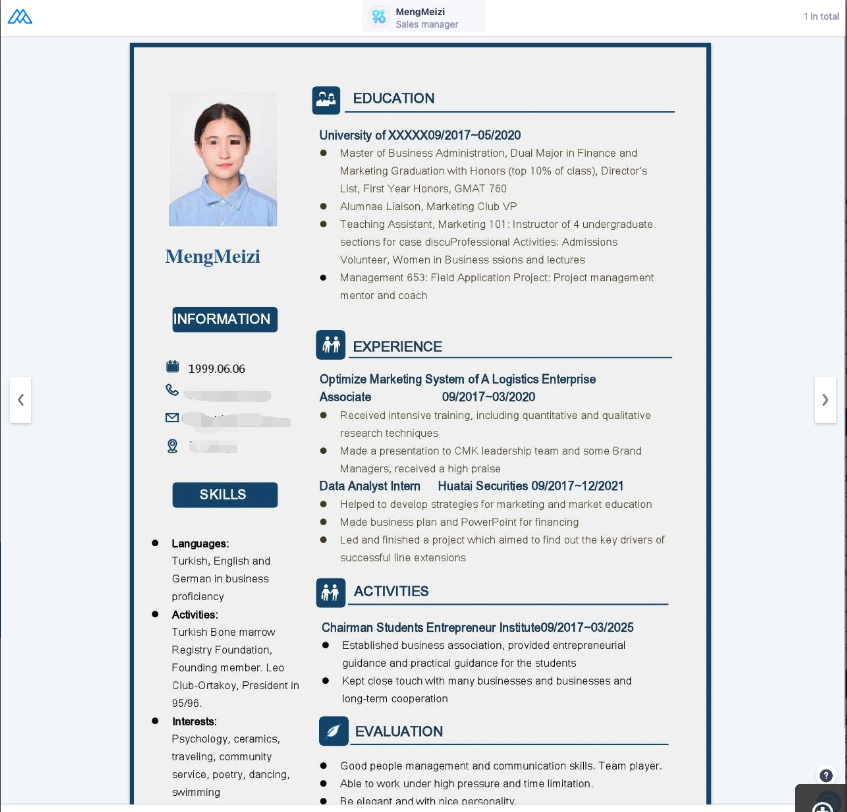
4.3.Screen Resume
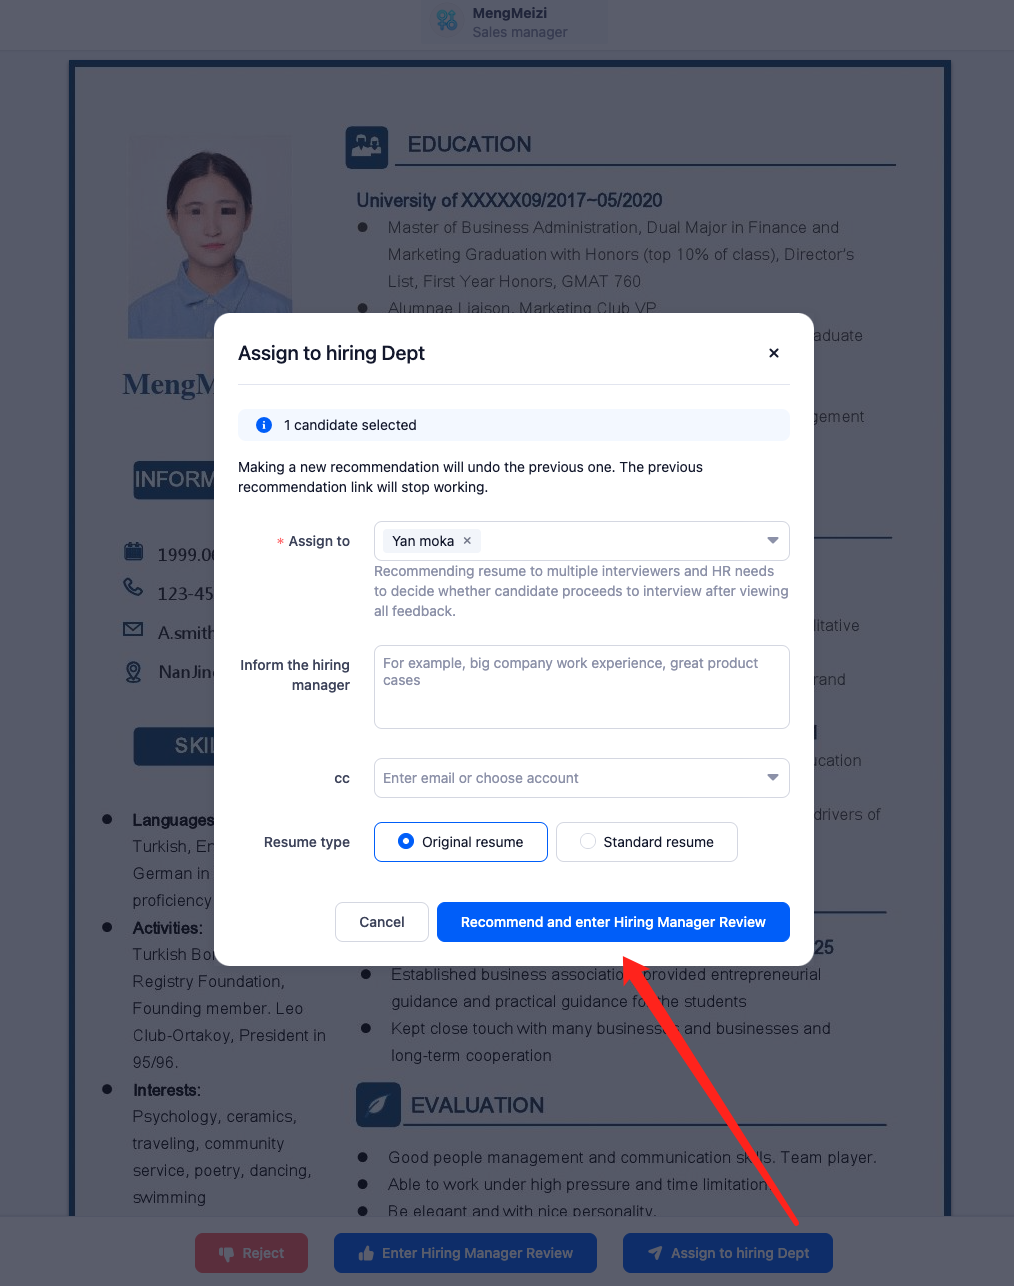
4.4.Assign to hiring Dept
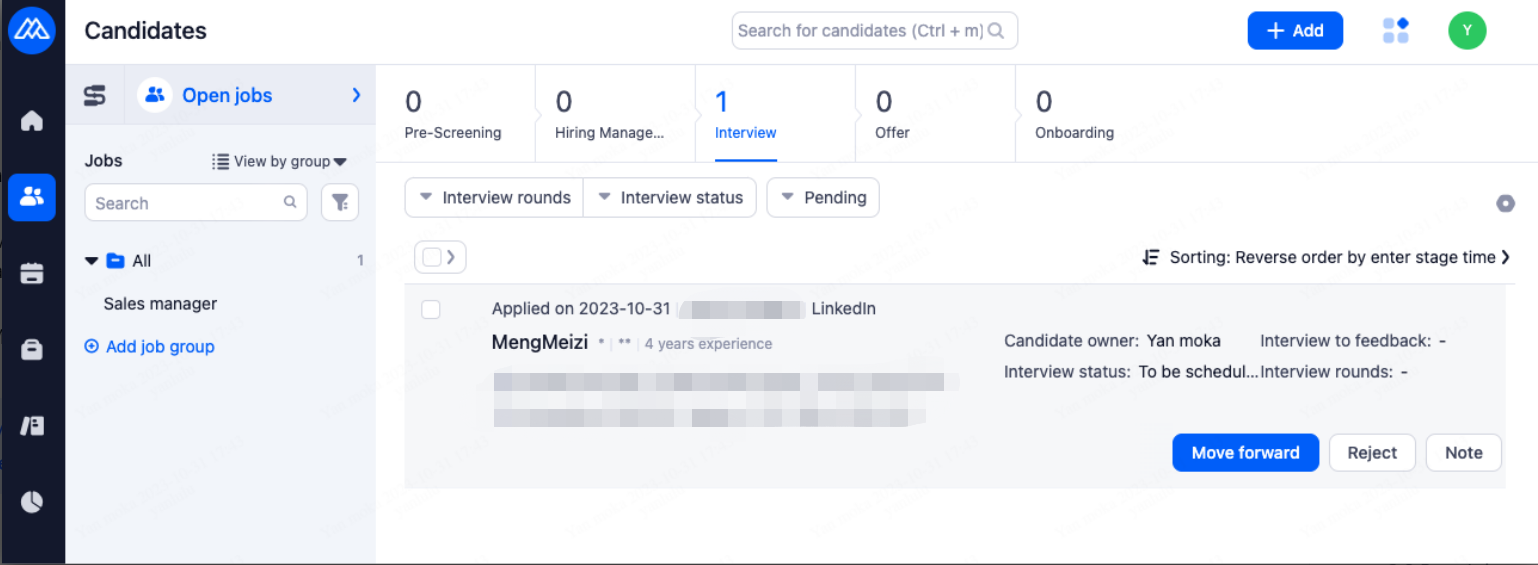
5.Interview
Once approved by the hiring manager, it will automatically proceed to the next stage.
5.1.Add Interview

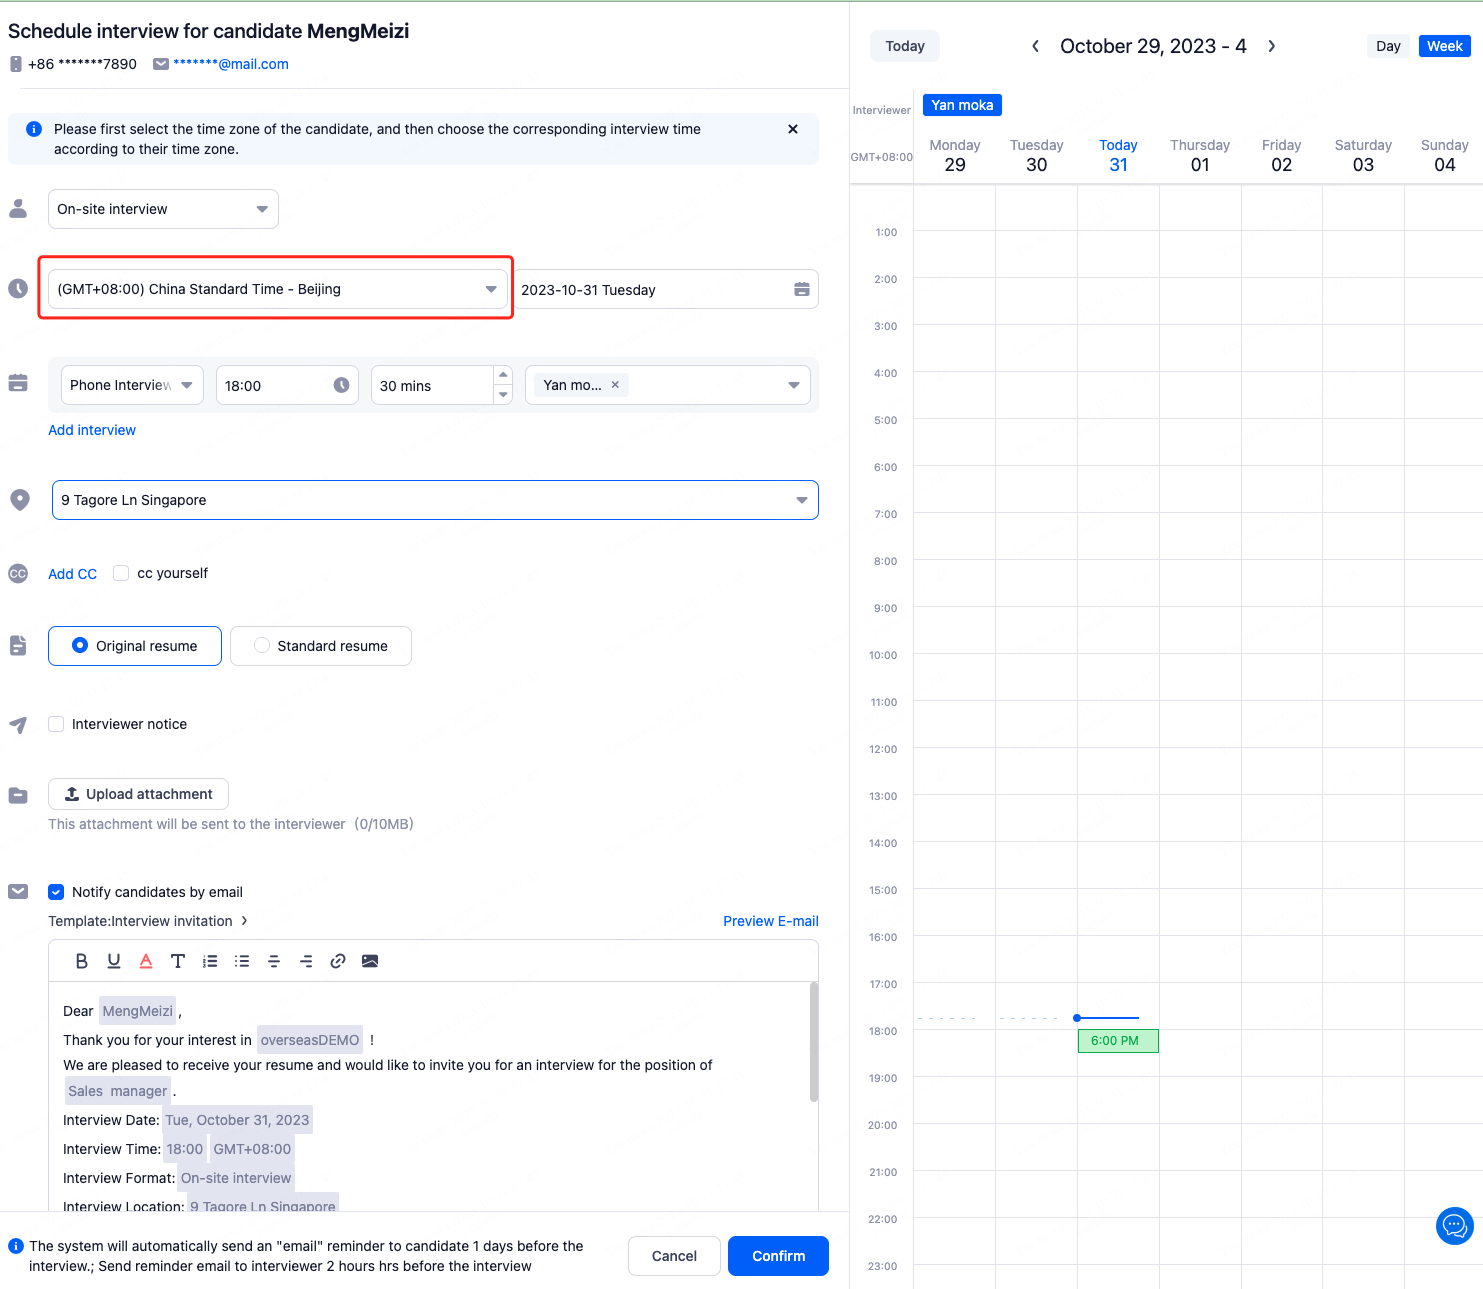
Note: If the candidate and interviewer are in different time zones, please select the time zone of the candidate first. Notifications and reminders sent to the interviewer will be automatically converted to the interviewer's own time zone.
5.2.Book Interview
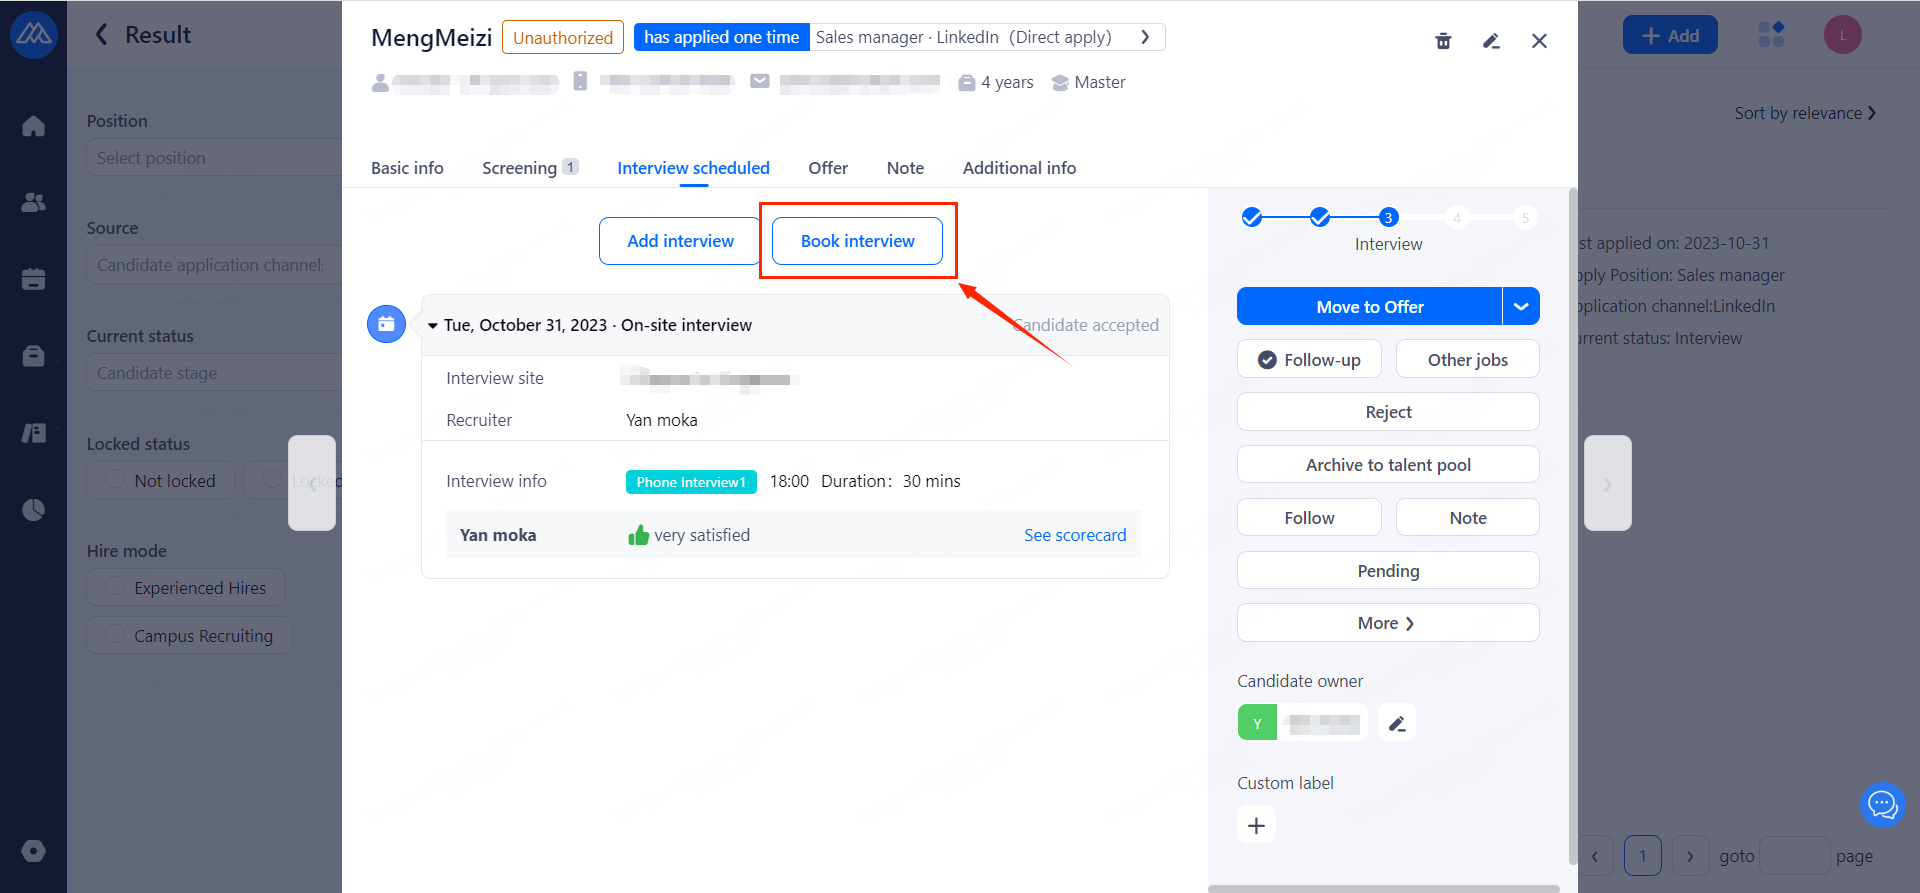
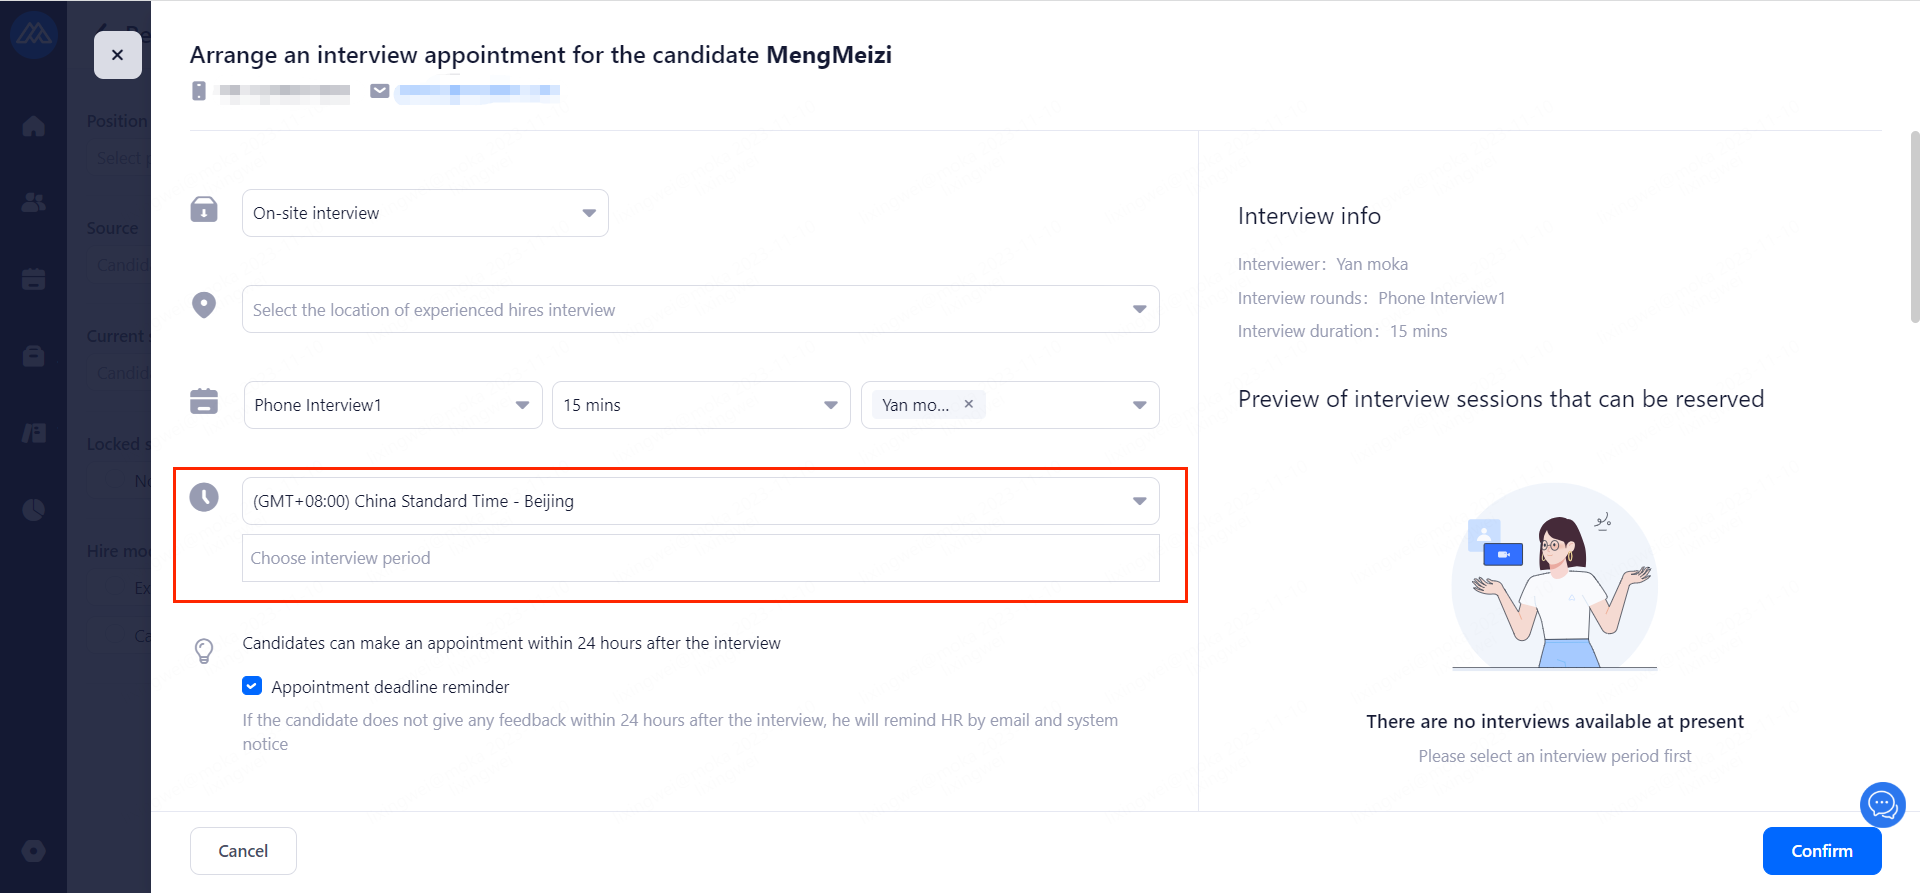
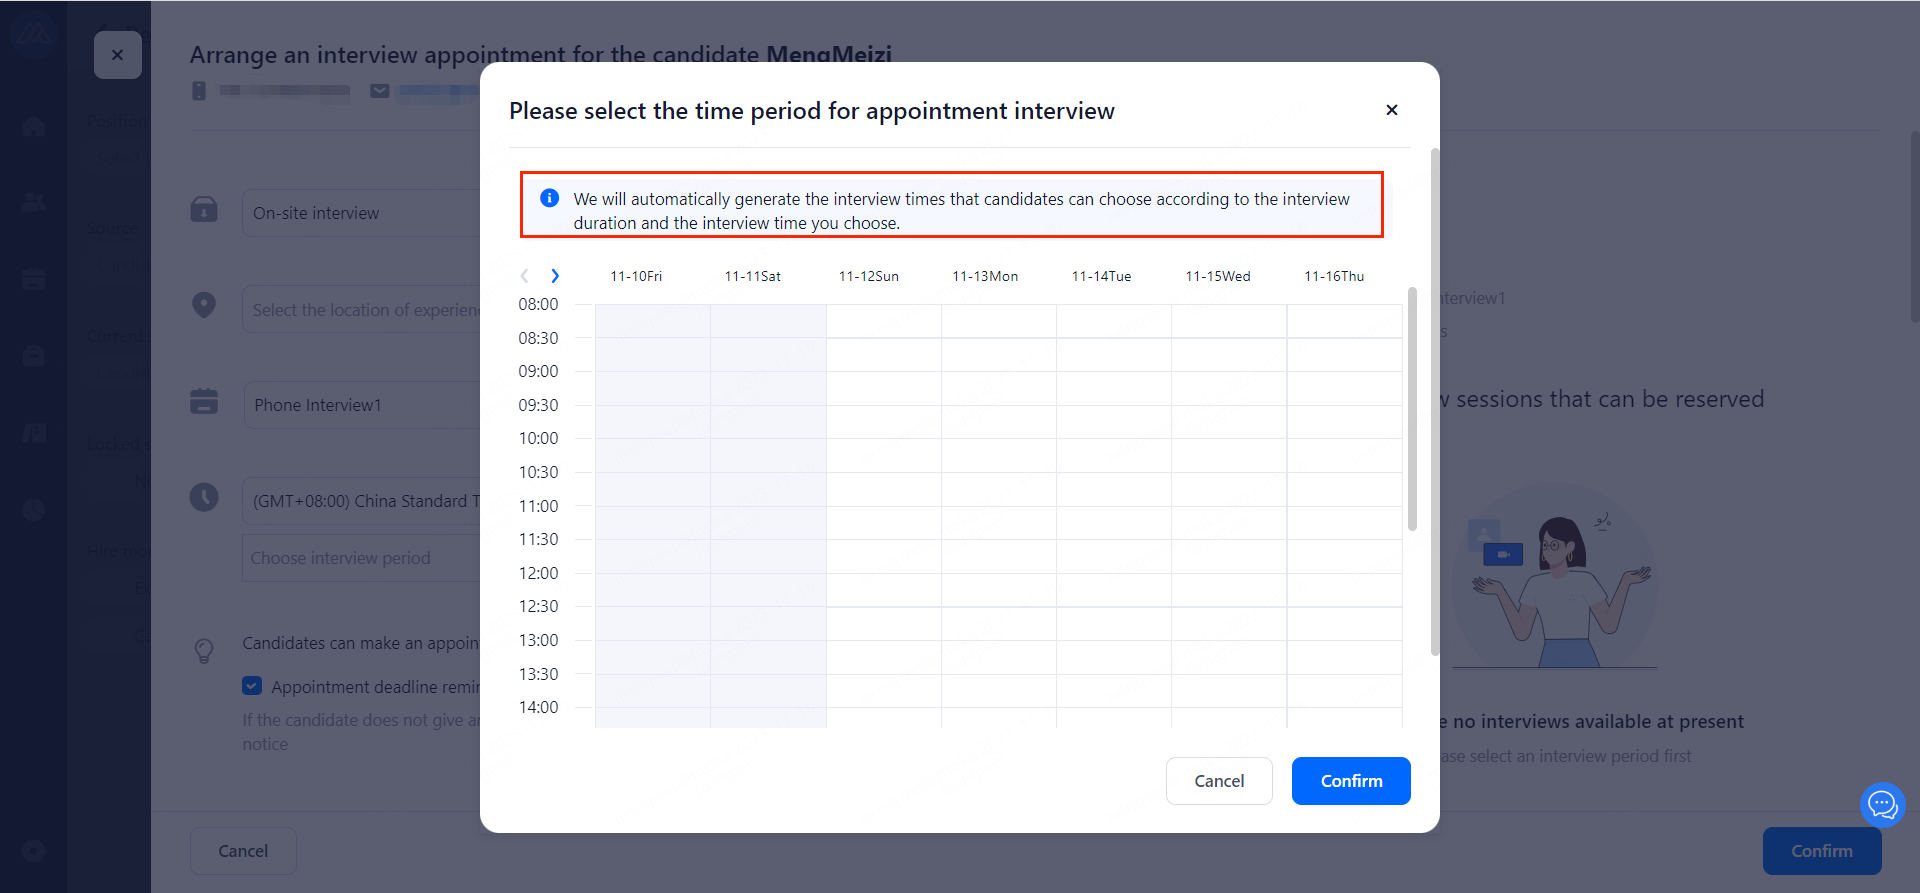
Note: HR first confirms the available interview time with the interviewer, then sends it to the candidate to make an appointment, and the candidate generates the interview schedule directly after making the appointment.
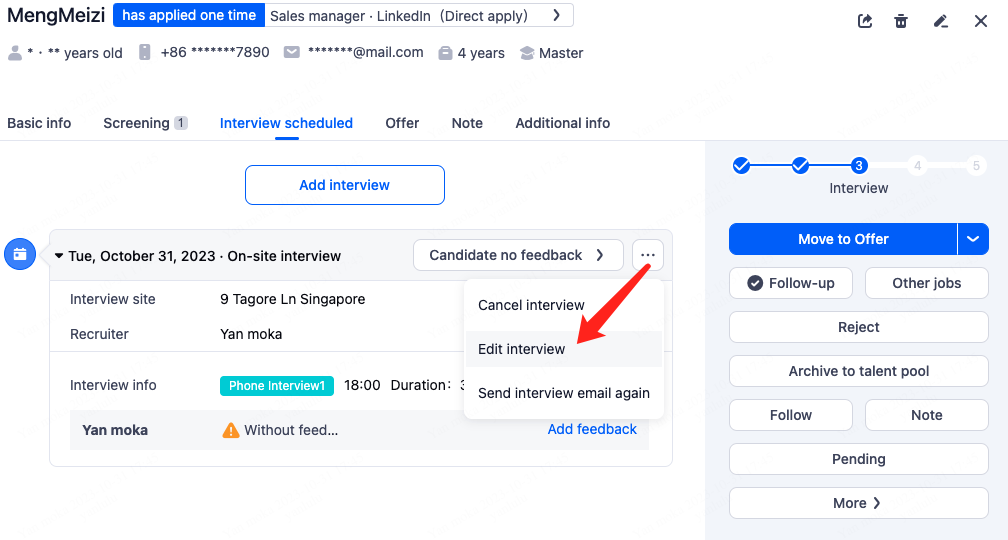
5.3.Edit Interview
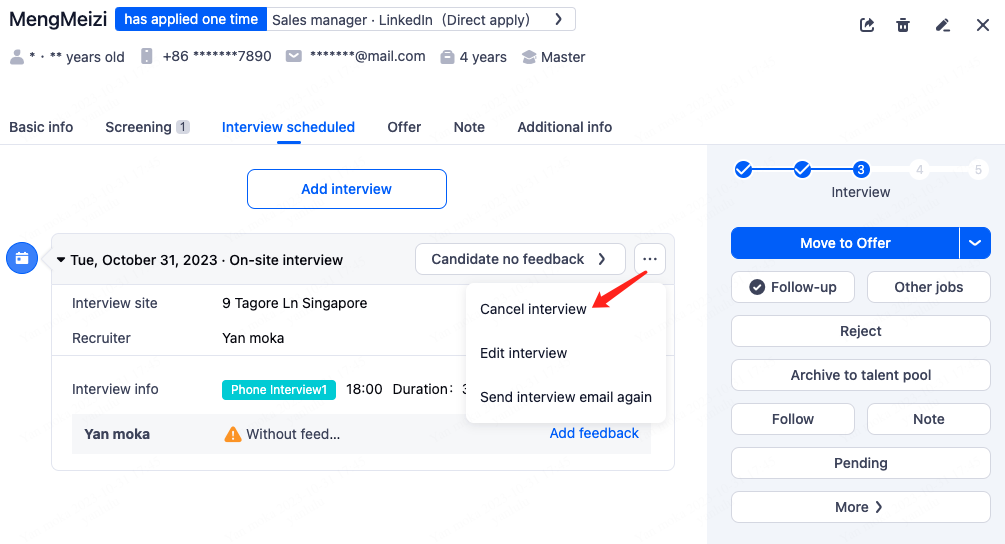
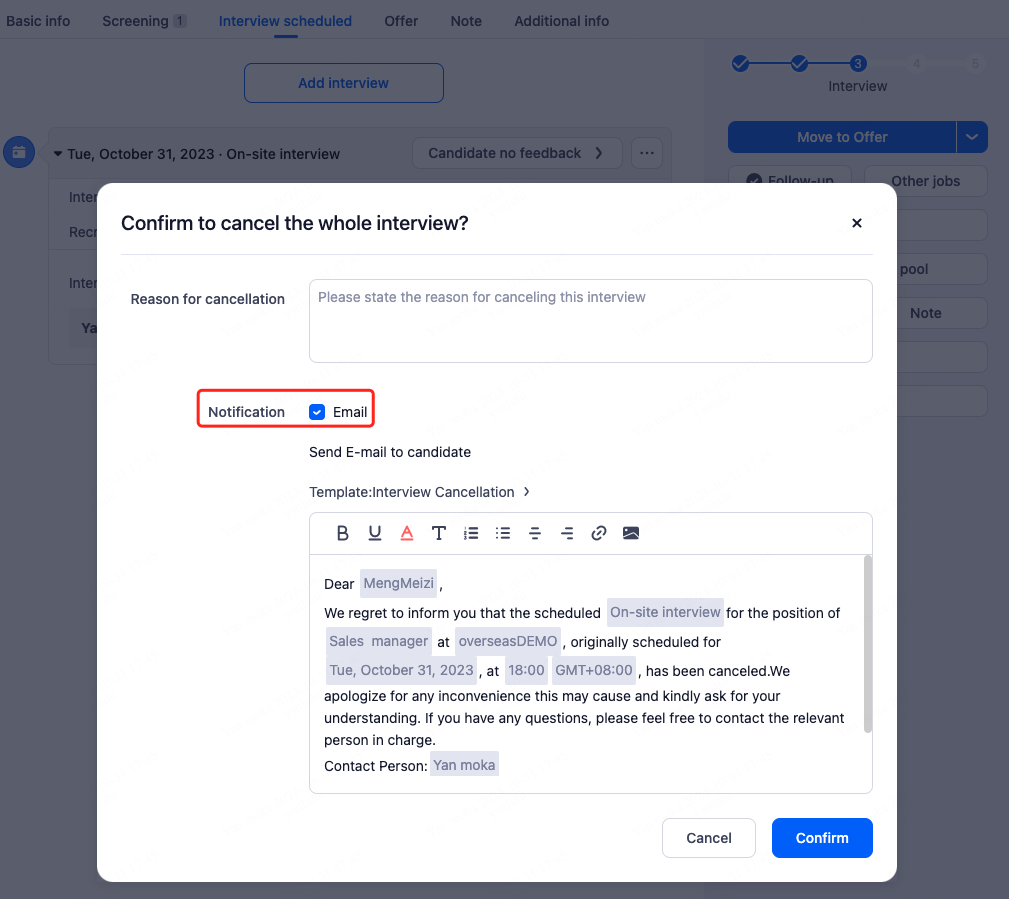
5.4.Cancel Interview
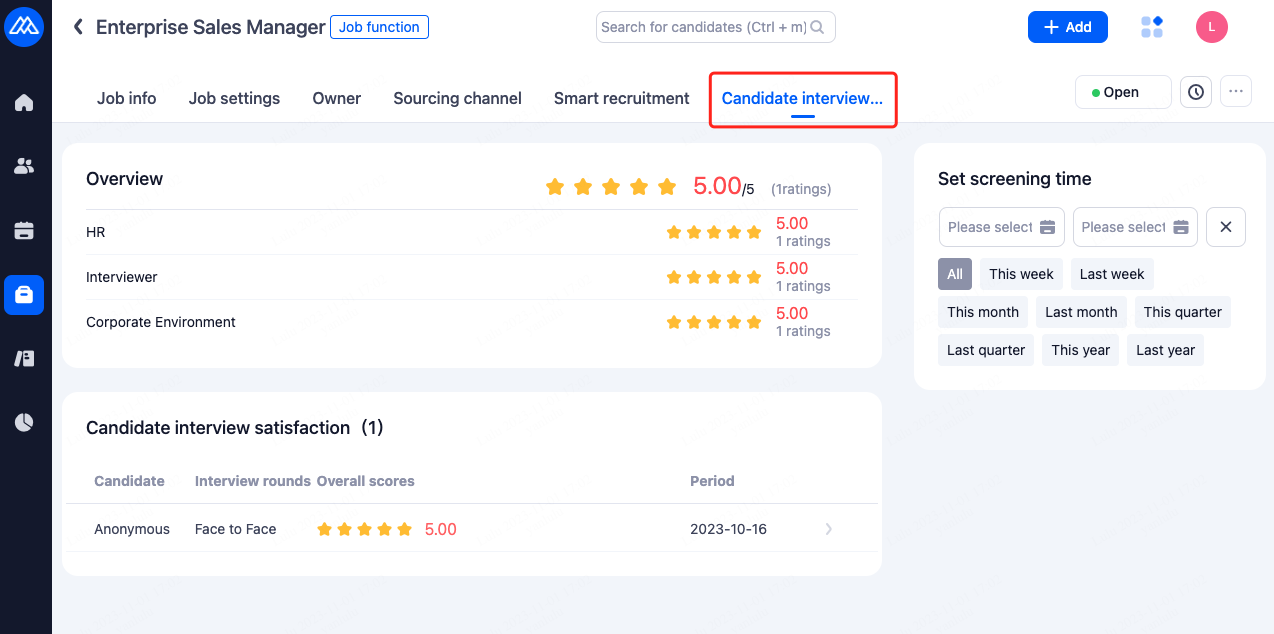
5.5.View Candidate Satisfaction Evaluation
Based on the system settings, the system can automatically send a satisfaction survey questionnaire to candidates after they complete their interviews. You can view the survey results on the job details page.
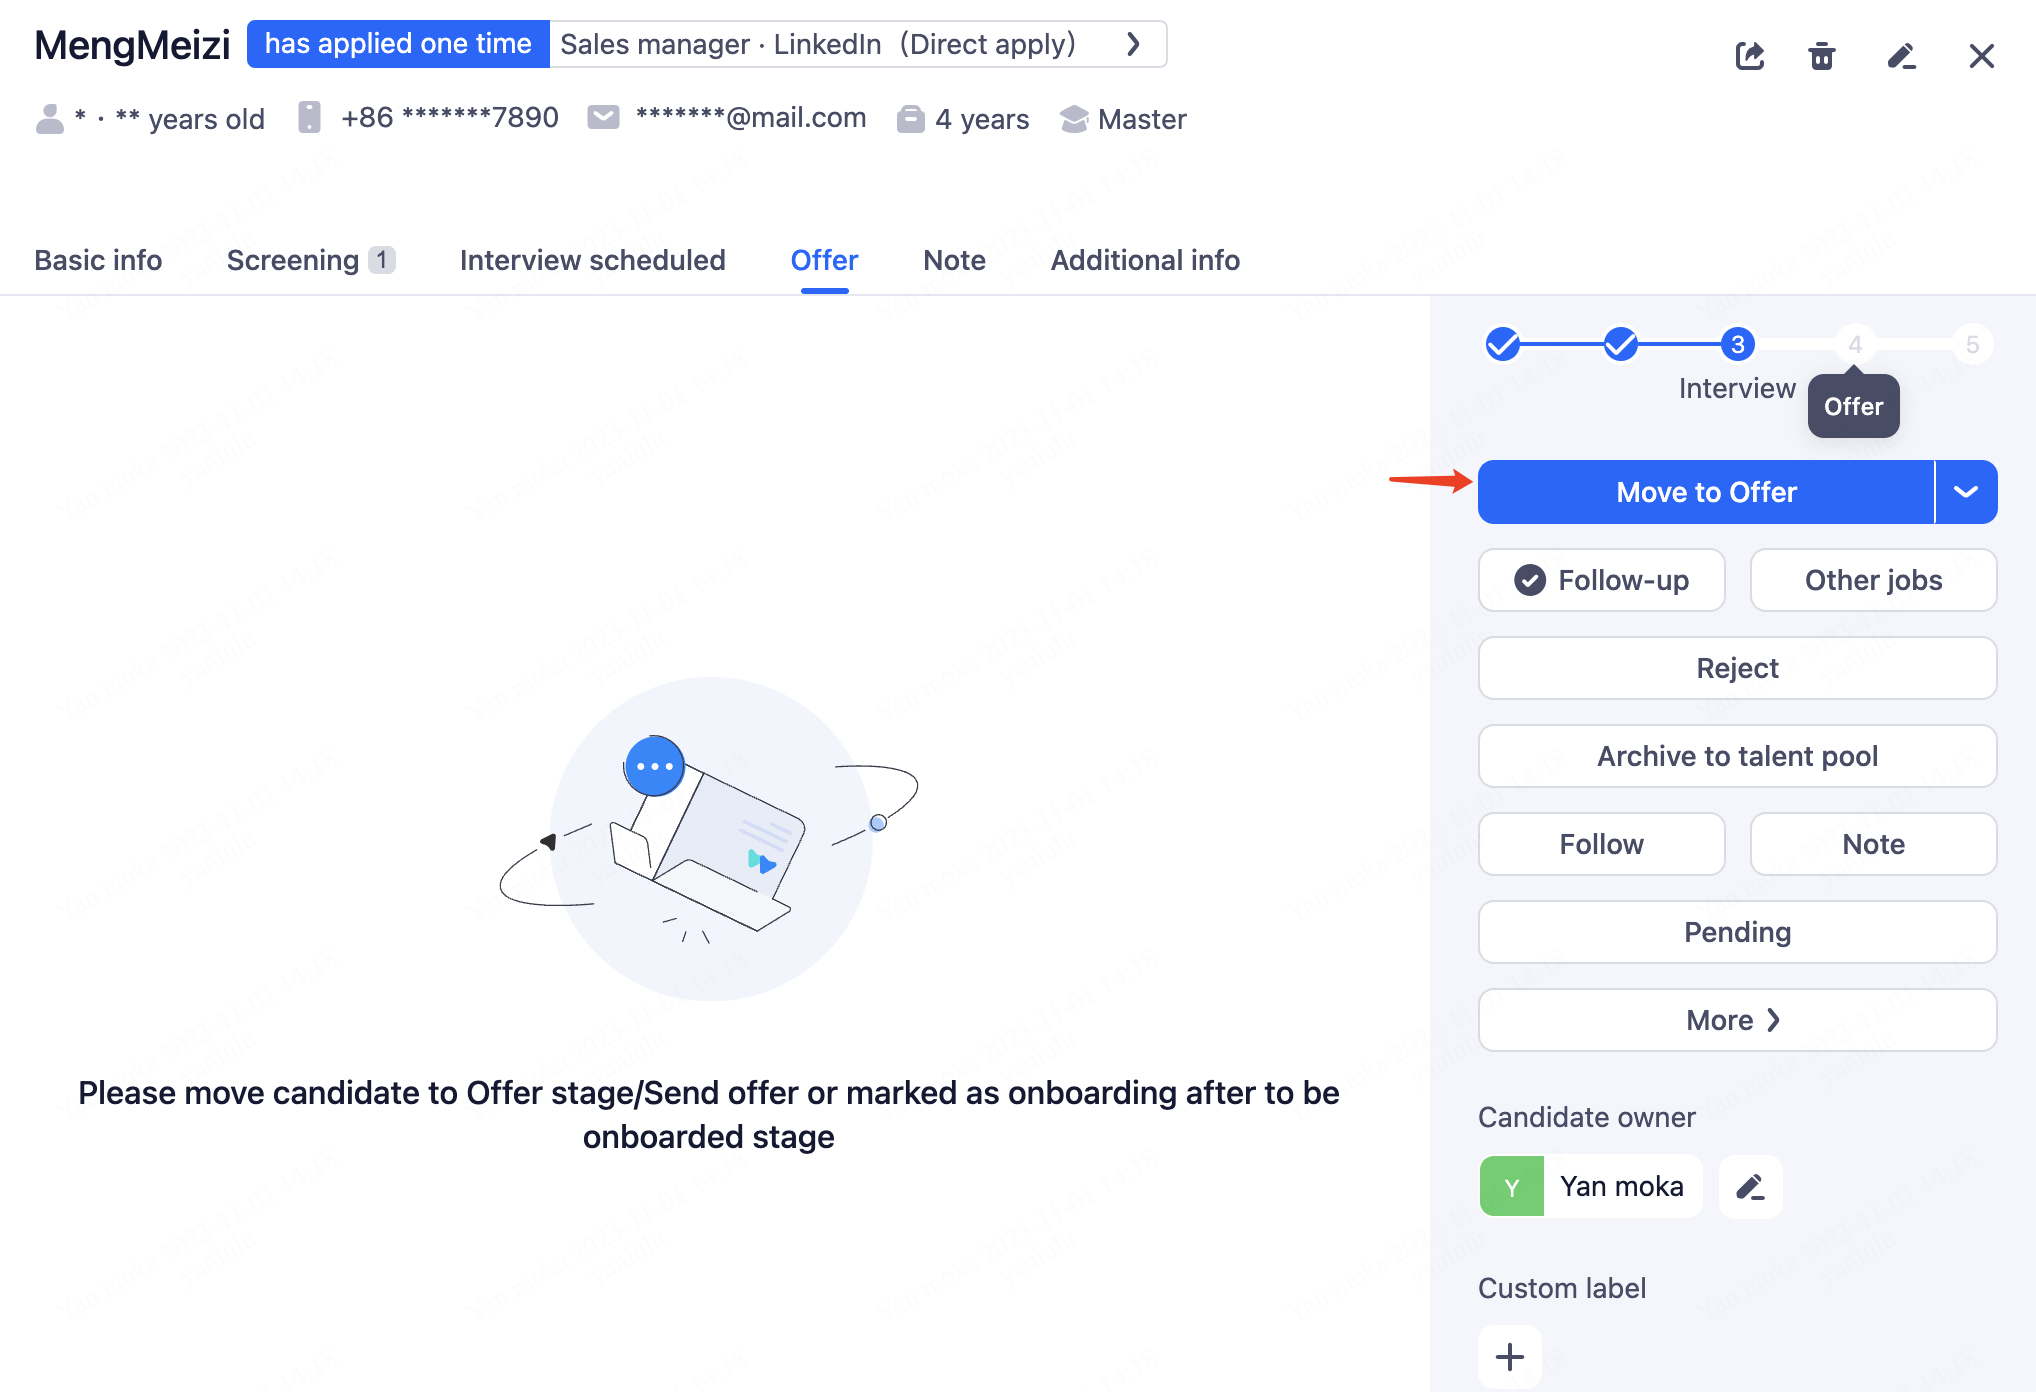
6.Offer
6.1.Step 1 :Advance the Recruitment Process to the Offer Stage
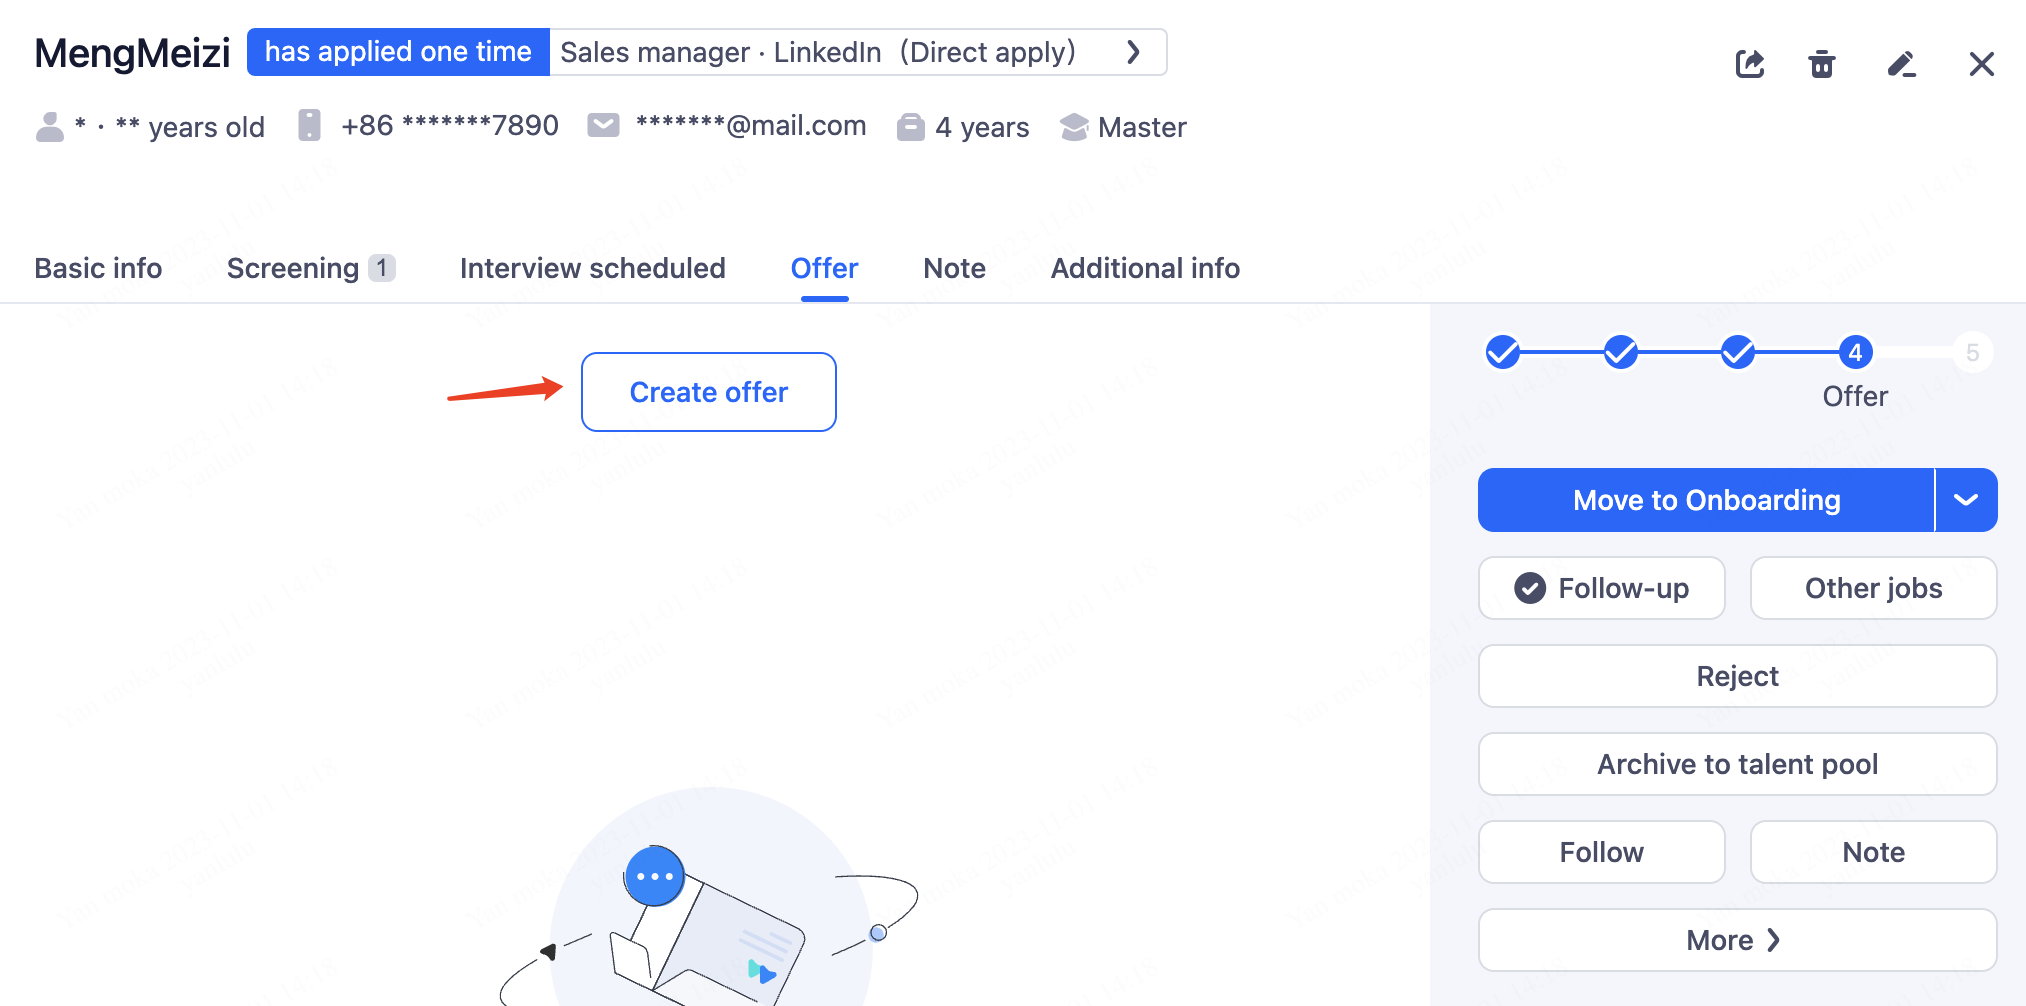
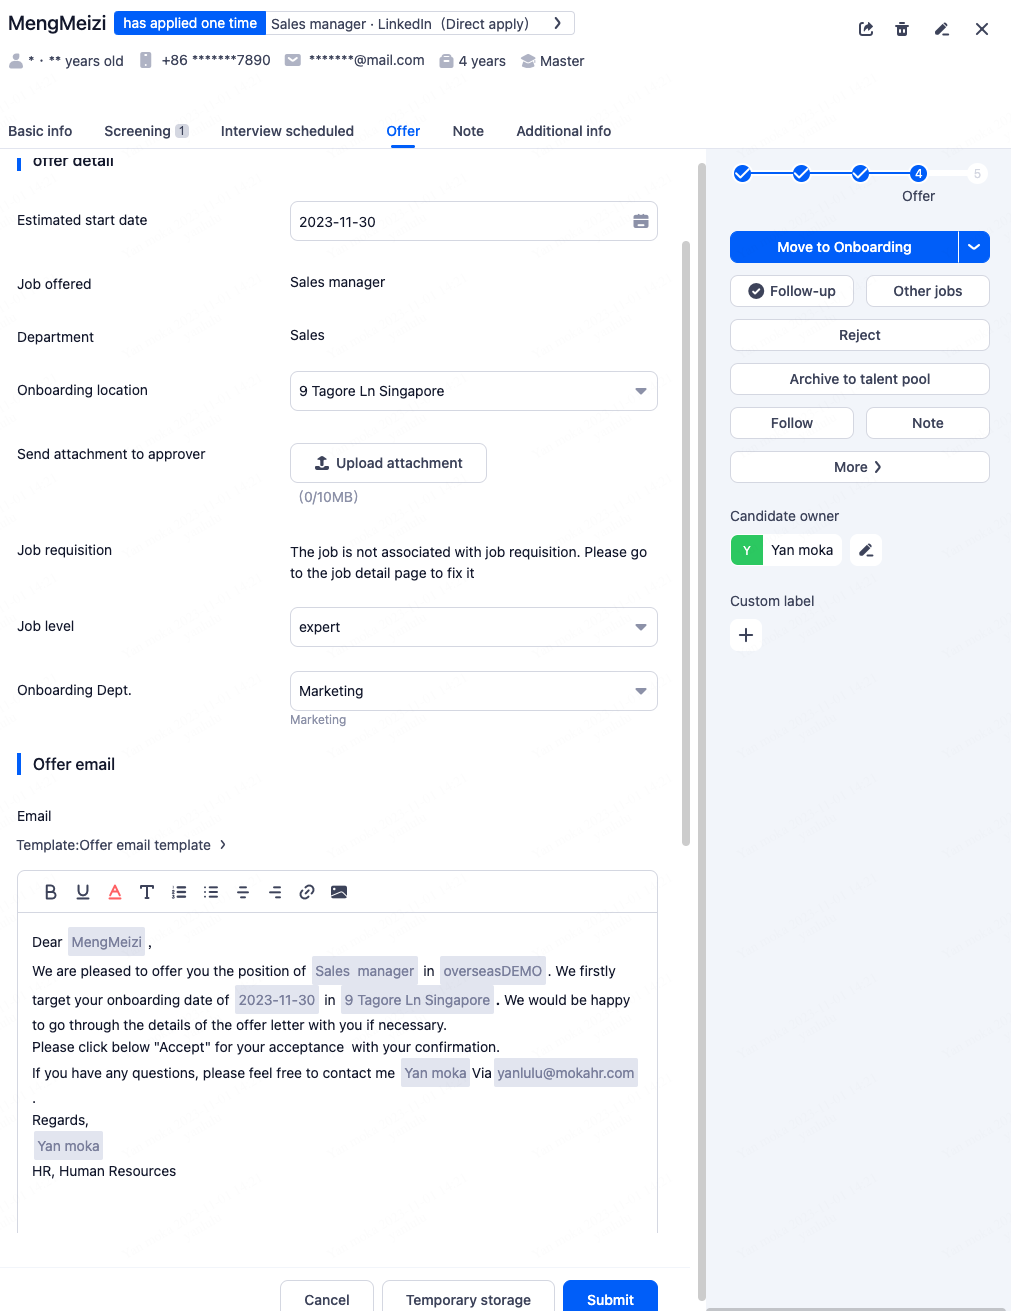
6.2.Step 2:Create Offer
6.3.Step 3:Approval Offer
①Select the offer approval workflow.
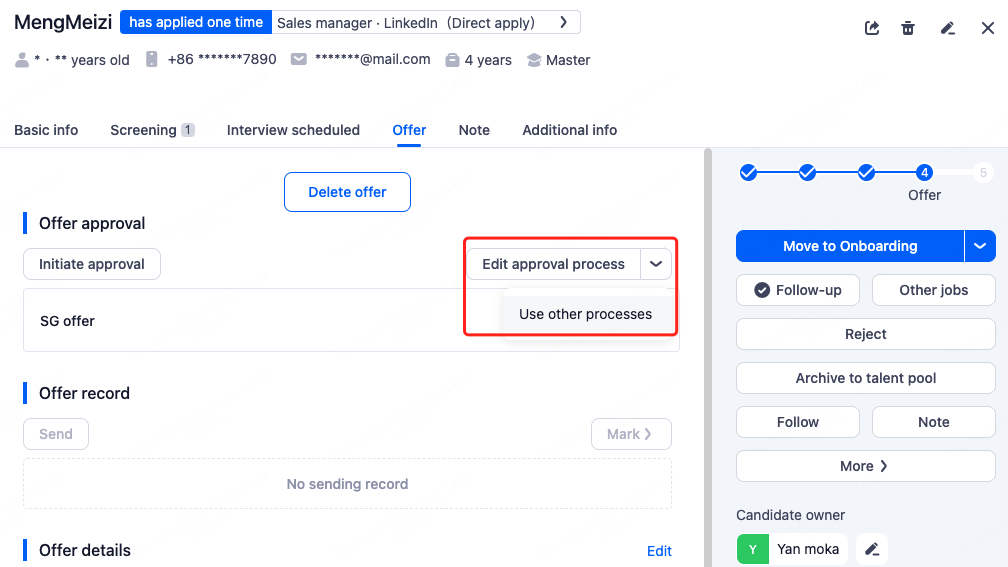
②Initiate Approval

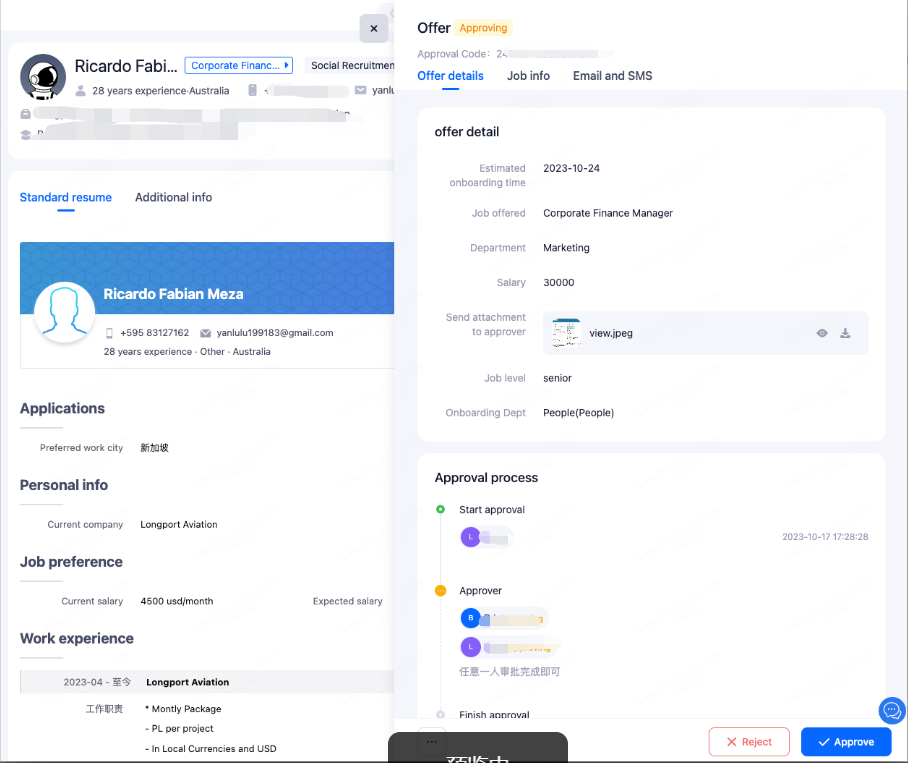
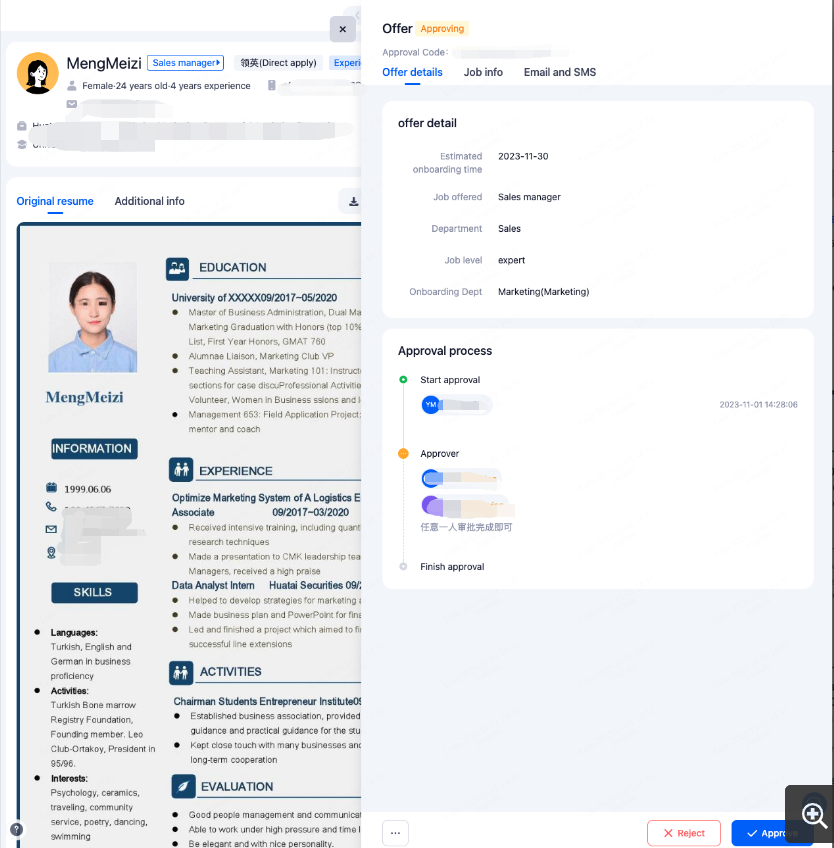
③Approve Offer
As an approver, you will receive an email notification. Clicking on "Approve" will directly redirect you to the system's operation page. If your company's IM system is integrated with Moka, you will receive relevant notification reminders within the IM system.
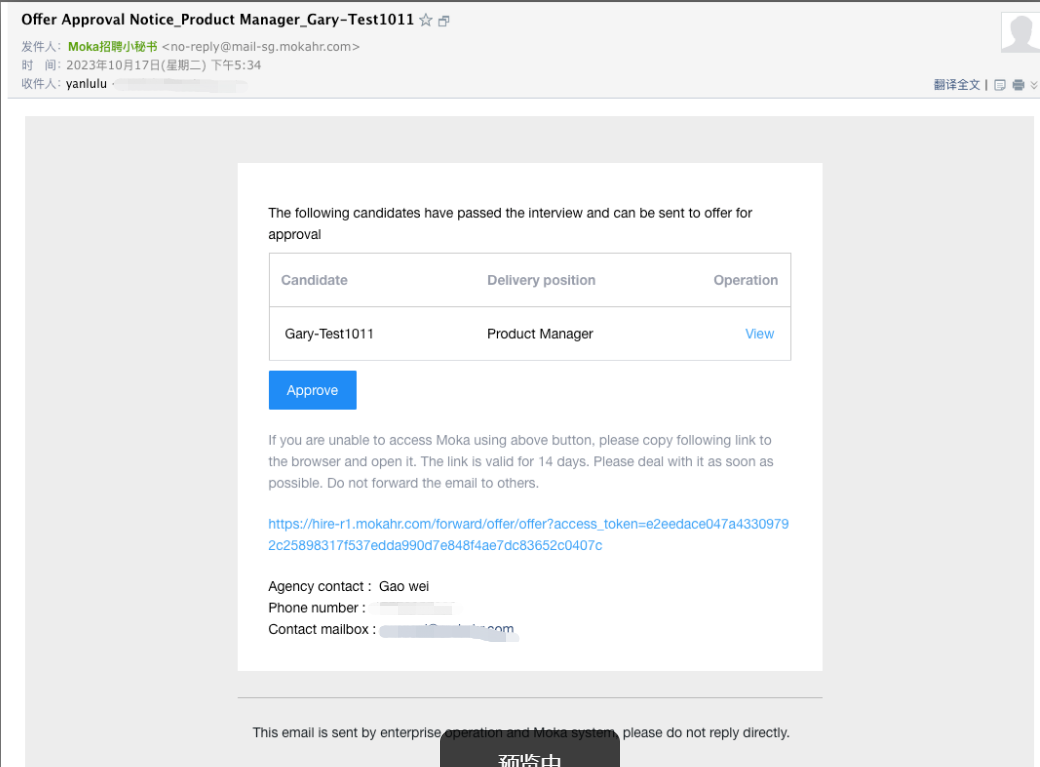
Alternatively, you can directly access the system to perform the approval.
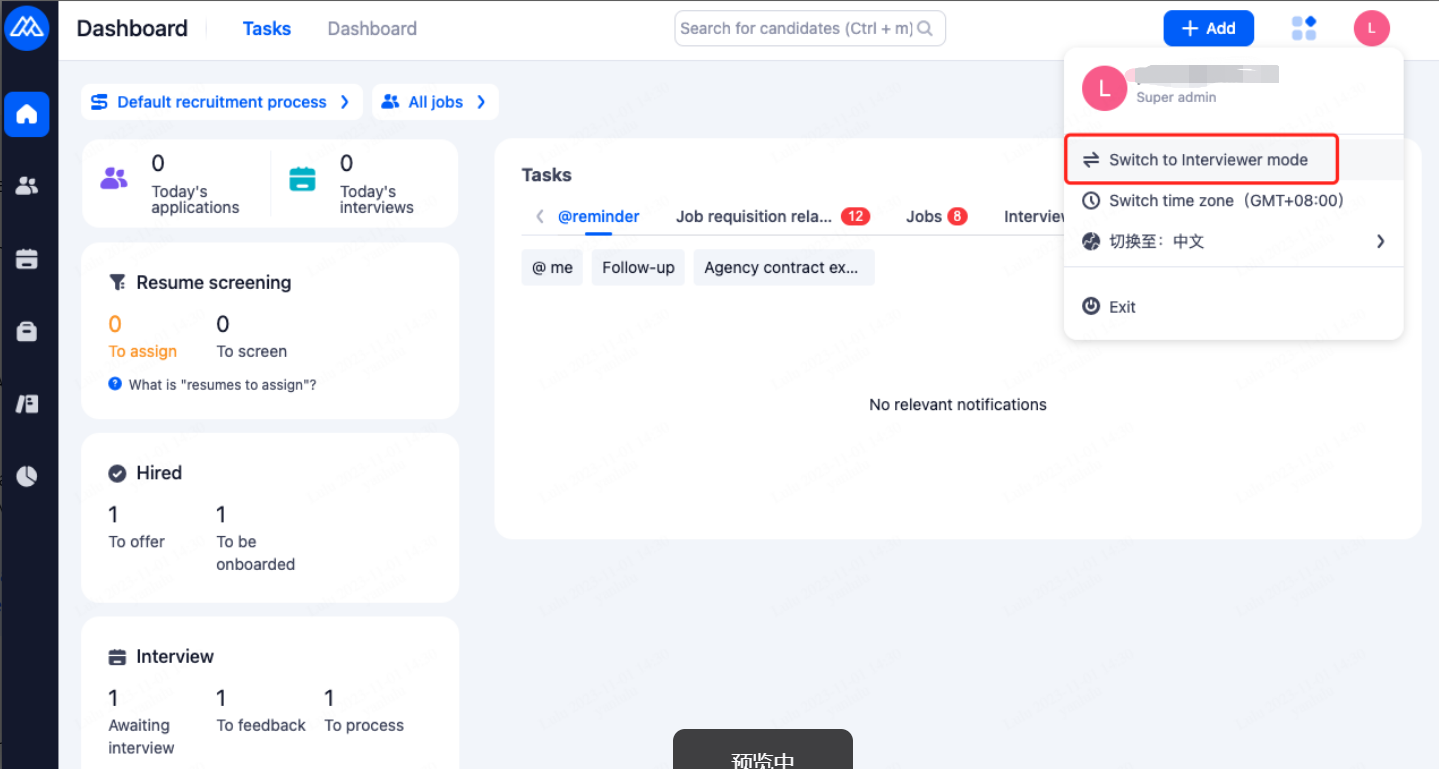
①Switch to Interviewer Mode first
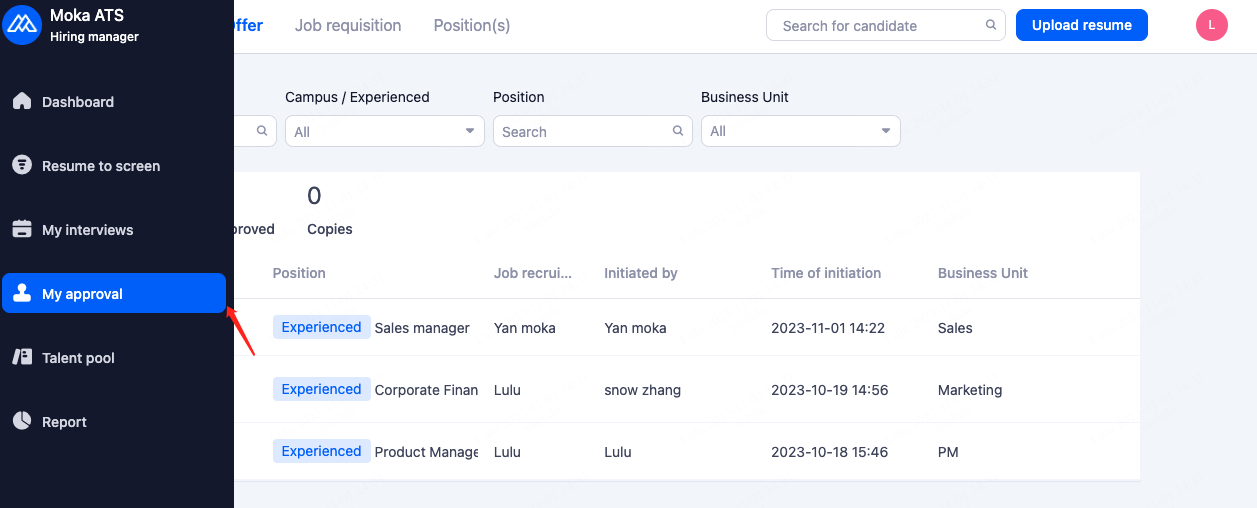
②Enter the approval list to proceed with the relevant approvals.
6.4.Step 4:Send Offer Letter To Candidate
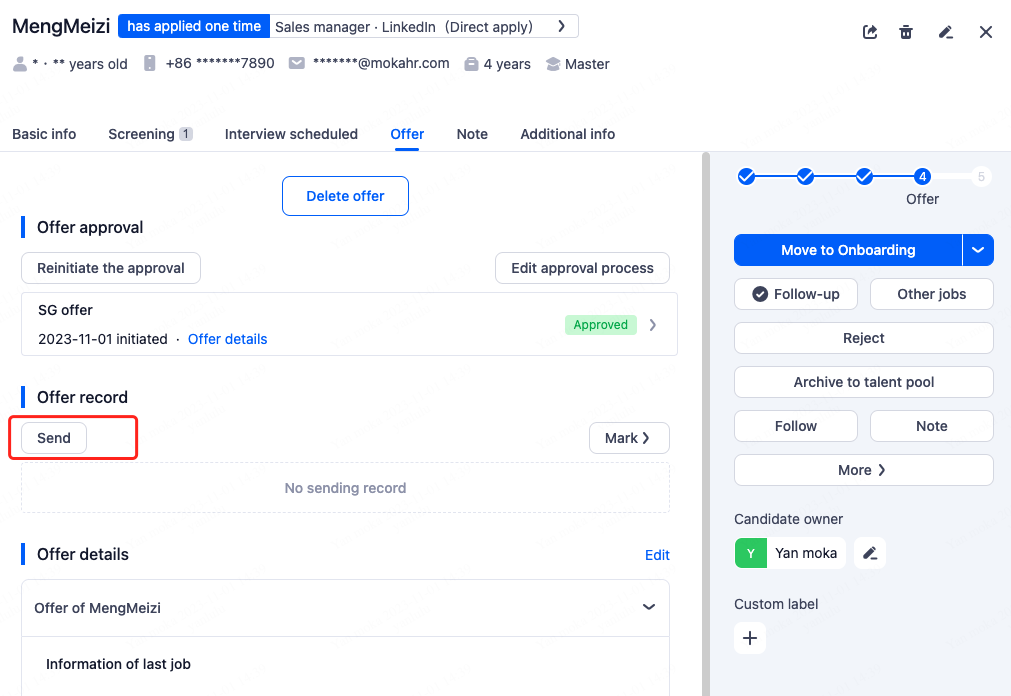
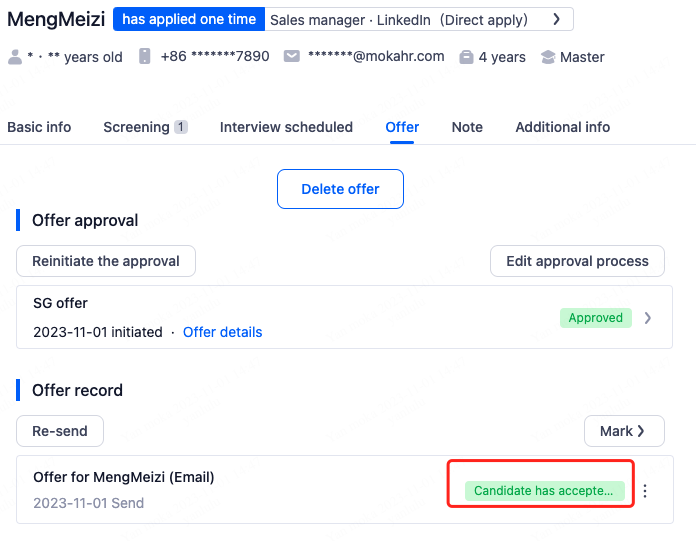
The candidate will receive an offer notification email, and you can view the candidate's feedback within the system.
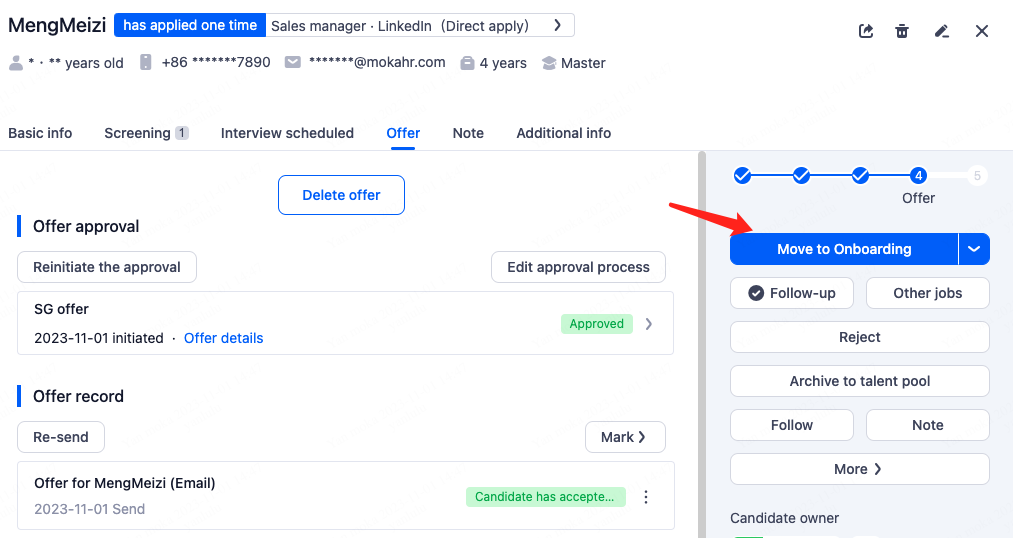
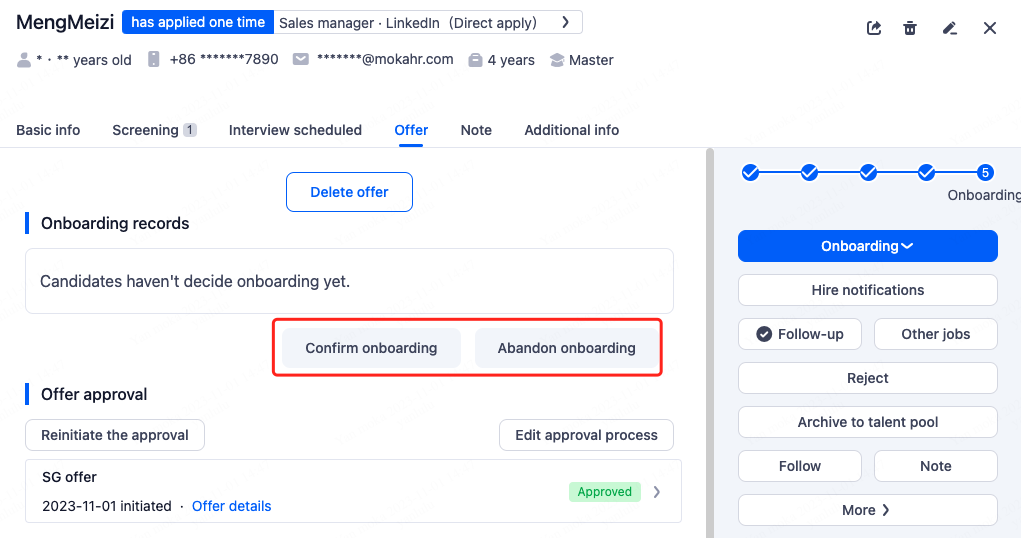
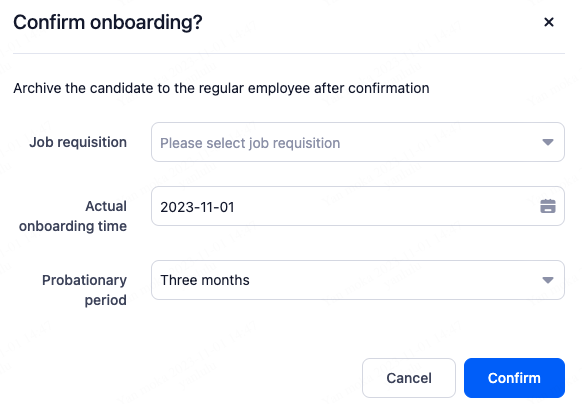
7.Onboarding
7.1.Step 1:Advance the Recruitment Process to the Onboarding Stage
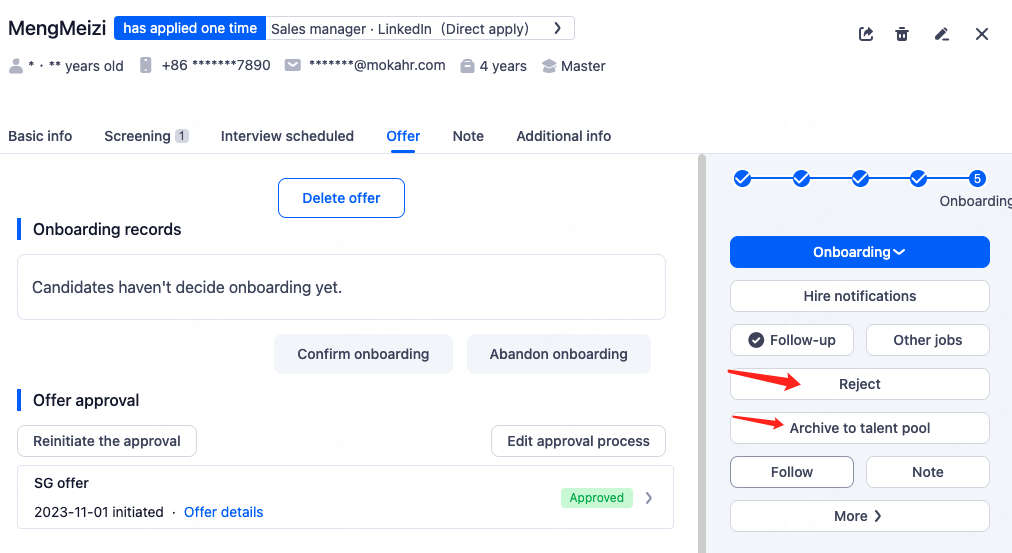
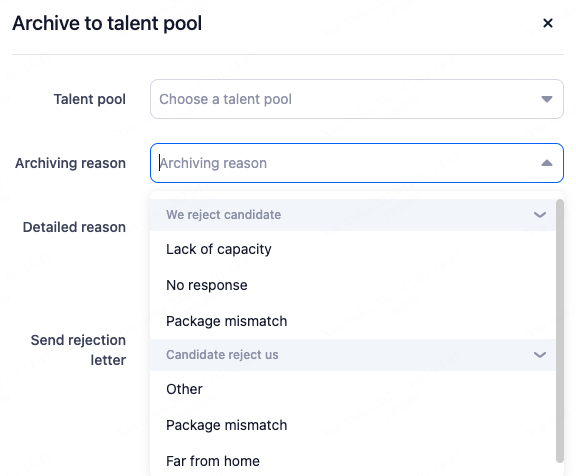
7.2.Step 2:Archive to talent pool
If the candidate is not suitable or voluntarily withdraws, you can directly perform the relevant actions within the system.
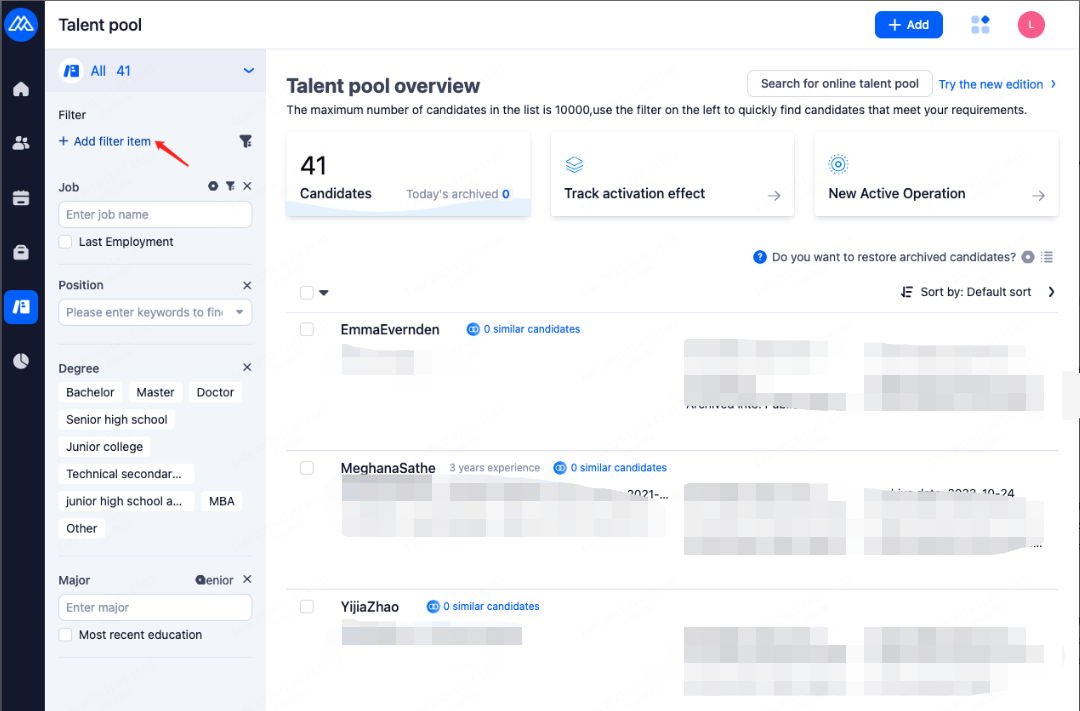
8.Talent Pool
8.1.Search For Candidates
You can filter target candidates by combining different criteria.
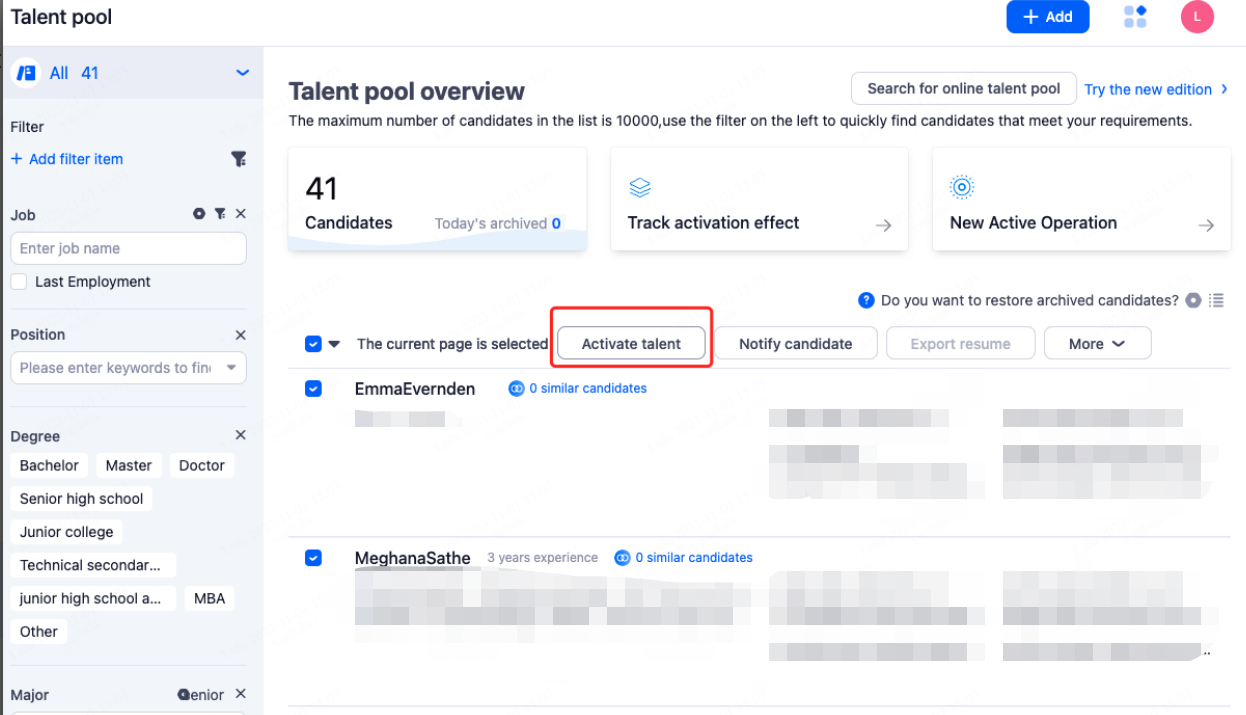
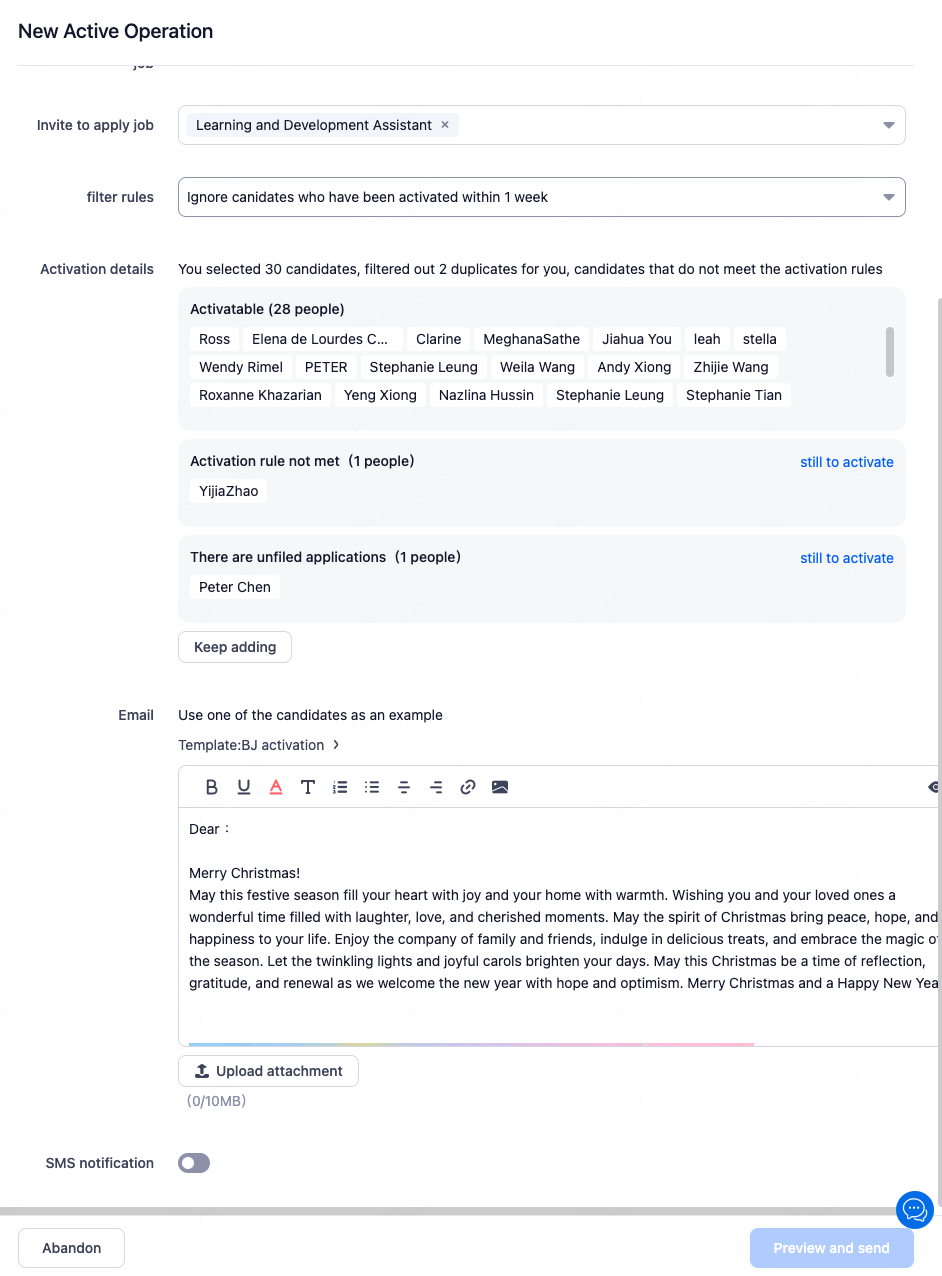
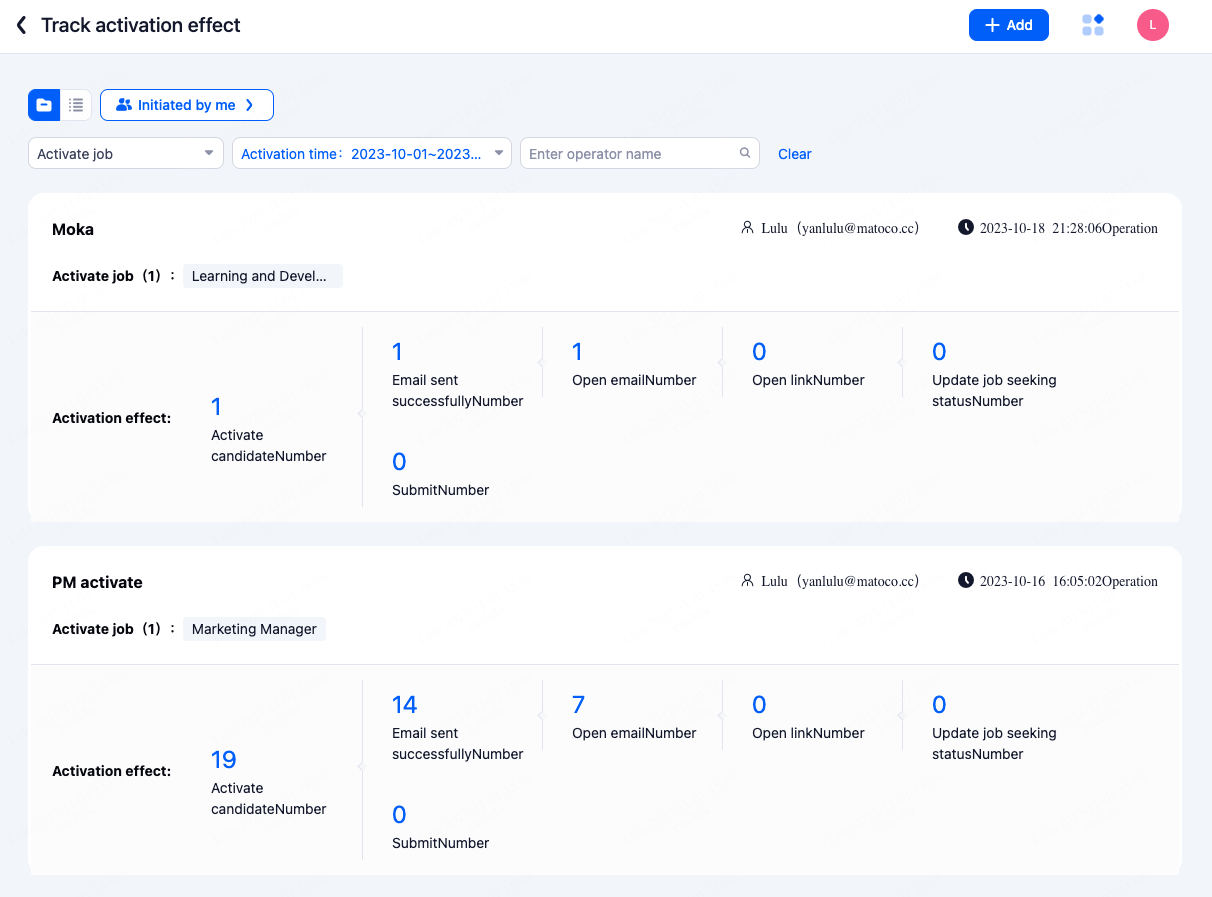
8.2.Activate Candidates
You can use the system to bulk invite target candidates to apply or perform other activation actions.
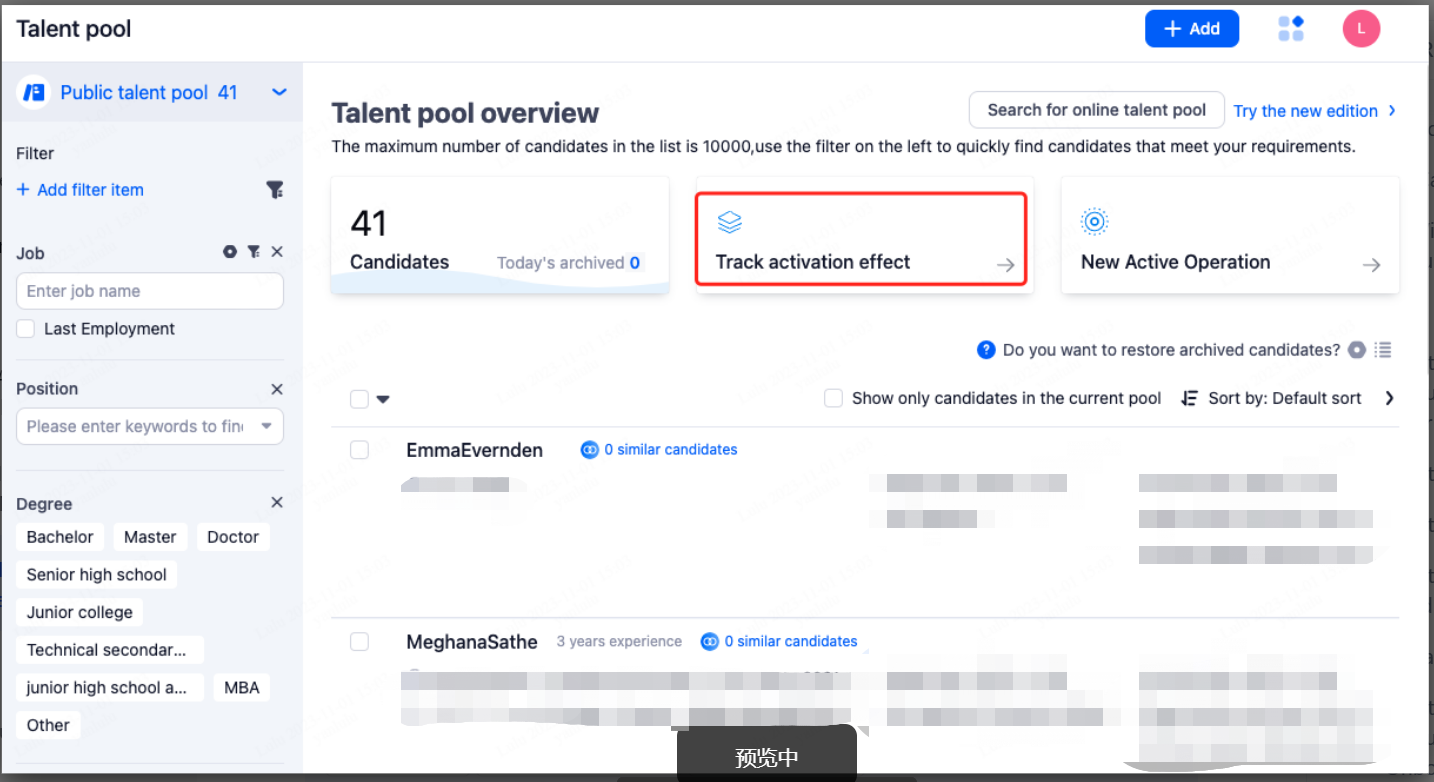
You can track the activation effectiveness through the system.
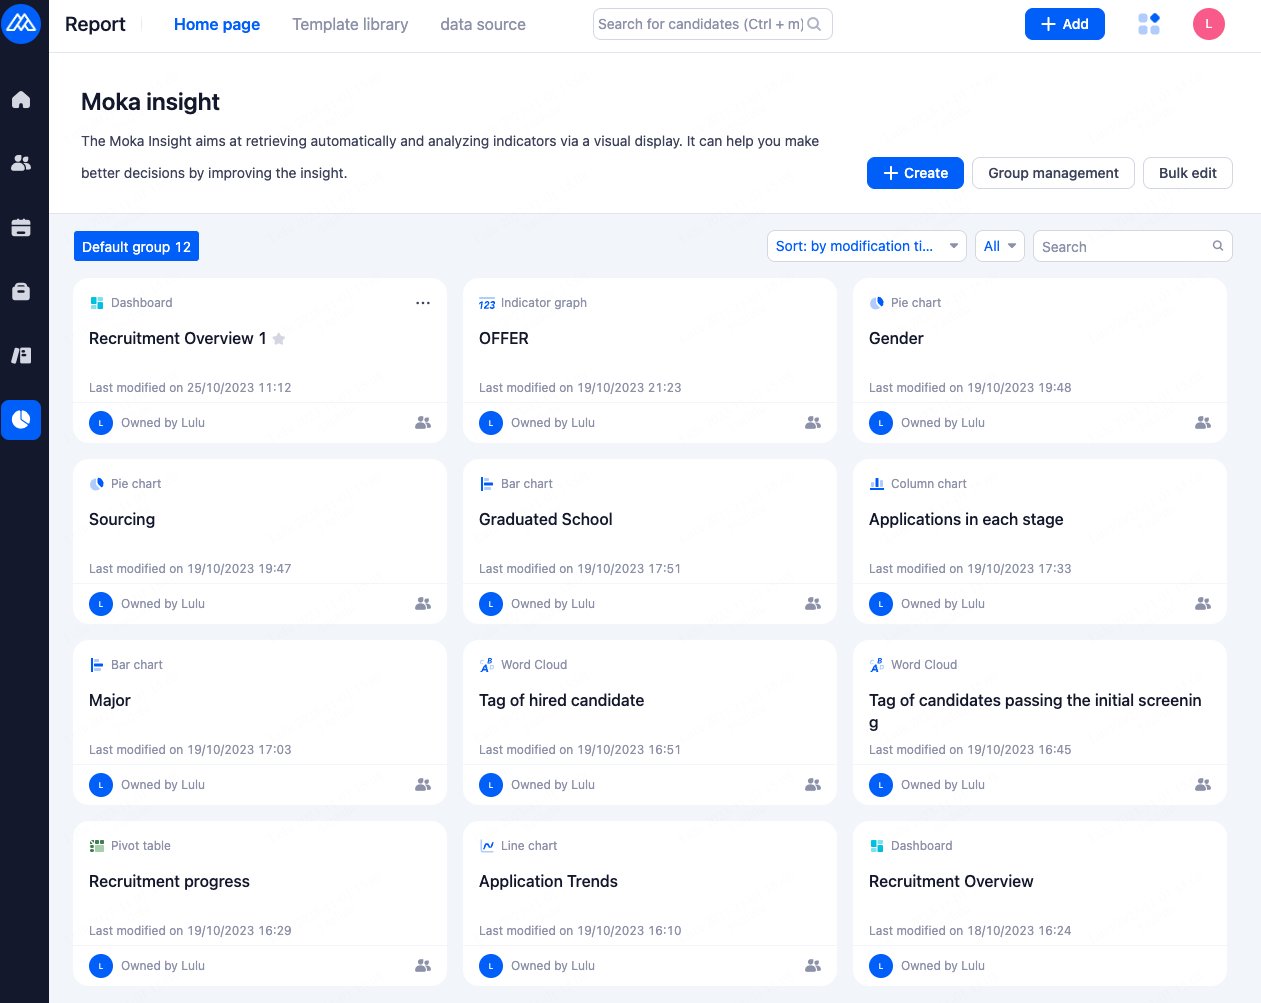
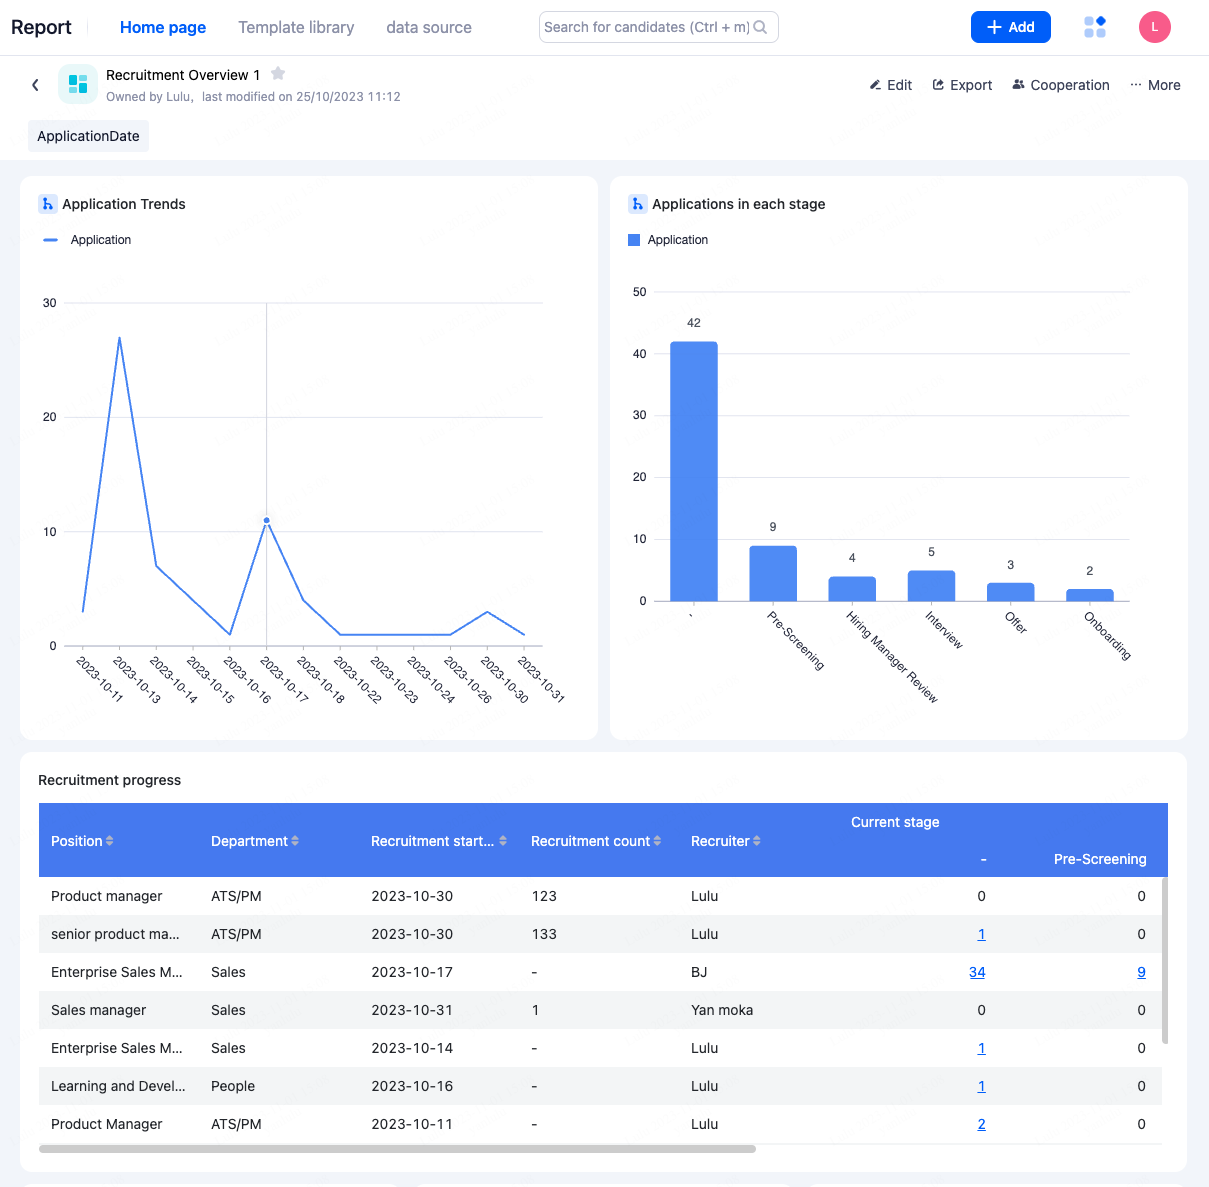
9.Report
If you need to configure reports, you can contact Moka's Customer Success Manager (CSM).